Posts Tagged ‘horns’
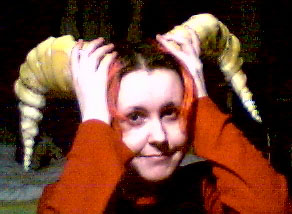
How to make a Maren Hair/Horns combo… meal.
|
Nobody really knows what a Maren keeps under it's hat, if it indeed IS a hat, lol, we all like to argue. For those of you who want some pointy ram type horns here's a tutorial to show you how easy it is to make some. They can be used for cosplay, for Halloween and for Ren stuff. They can be made in all shapes and sizes, don't just go copying the examples i make, try experimenting. These horns are made from papier mache, not clay. Clay in small amounts can be seriously heavy and isn't the best material for head ornaments. It's possible to make 2 molds and cast them in resin or fiberglass but this is the cheap, simple and chipper way. Plus i suck at sculpture. These horns are recommended for use under a wig, not actually UNDER a hat because of the fact the weight wouldn't work (Unless your skull likes staples). These are still kinda heavy, and to be honest I'll be looking to create a new method soon. List of things you'll most probably need: -Lots of old black and white newspapers (color bleeds into white paint) Okay that's all the junk i remember using. As i'm talking through how to make these i'll suggest other alternative materials too. You'd be amazed at how old things in a trash heap can be turned into something pretty awesome with enough glue and sparkles! Things you should aim for when making horns-
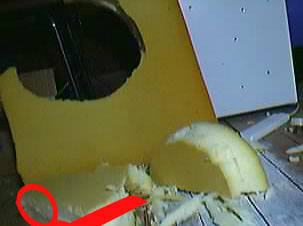
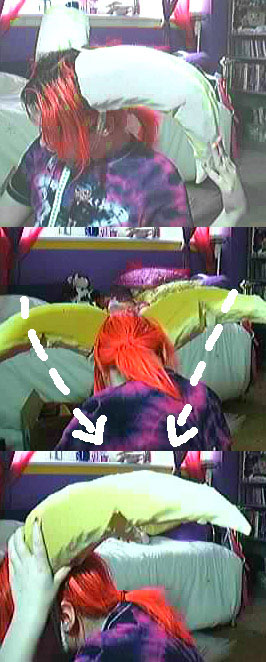
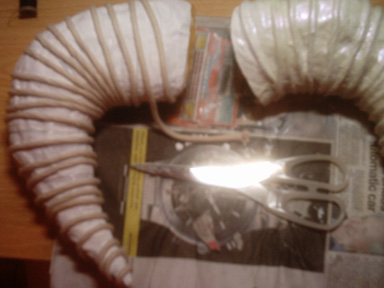
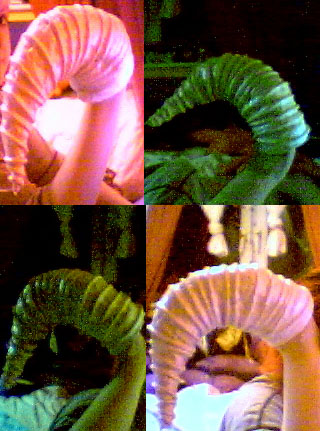
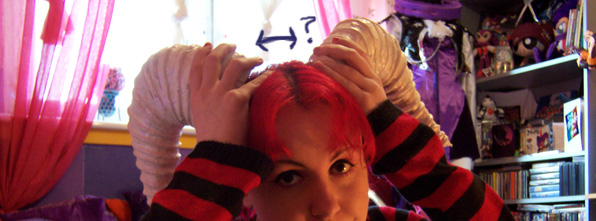
Step One- I HATE FOAM. Foam is like the bane of my existence. It's impossible to sweep up, you find it sticking to your head 3 weeks later and it makes you sneeze a lot. So first before you begin, clear your workspace, use a FLOOR because it will get messy, do NOT use a carpet. Put down a sheet of newspaper or something. There! Okay the non fun part. Take your big bit of foam that should look like this stuff HERE—> Then take a felt tip pen or an old eyeliner pencil or something and draw a BIG curved 'L' shaped horn on it. Think of the shape of NiGHTS or Reala's head (Jackle is harder) and try to put it onto the foam. Then you want to take the stanley knife and cut right through the foam as straight as possible until you end up with a big ugly looking foam thing that bears striking resemblance to a moldy banana! Flip it over so it's on it's opposite mirror image side and use it as a template to trace your other horn onto the foam with your pen. It's important that you flip it over or you'll end up with two left horns instead of symmetrical ones. At this point you'll have these two big huge misshaped flat bits of foam and you'll hate your progress. I did too. Feel loved i hate YOUR progress. Anyway! Take your two oversized foam boomerangs and using these photos as something of a bad guide cut the squareness away from the sides of the horns using the big scissors (or carve it with the stanley knife) It's sort of like peeling an apple or sharpening a stick. But be careful with the blade. You don't want to trim TOO much of the foam off or you'll end up with skinny rubbish horns that will just snap in half. Voila! You'll see there that i've smoothed/carved off all those nasty flat square edges and now the foam is slightly rounded. You'll also see that i've cut out two big triangle wedges about half way along the underside of the horns. This is so they don't stick straight out (like picture two) and so you can be crafty and make them curve inwards/outwards/wherever like proper Maren ones (like the arrows indicate). Push them in two and you'll see they curve better now. Your aim is to take the needle and thread and stitch the big triangle gap closed so they STAY in a bent over curved horn position. Use a LOT of thread and don't be afraid to make a mess, as long as the stitches hold. I think that's the hardest part because the thread will keep tearing through the foam, but persevere and eventually you'll have sewn the floppy bits tightly down against the rest of the foam. It should now look something like THIS—>
Now, Pastry horns may be okay for bad Reala jokes but we want shiny, rustic, bricky, shelly, CONCRETE HORNS YEAH. We want horns that will take out the eyes of our younger shorter siblings when we turn around at a Con too fast. We want horns that will get us jammed in doorways and leave us in embarrassing headlocks with fellow Maren cosplayers! So onto the next step! Actually, no, before the first step let me explain something i keep being asked a lot. The reason U.V's horns are a different shape from his hat is because the last angle in his hat is just full of his hair winded around. DON'T QUESTION THINGS THAT DON'T MAKE SENSE Step Two- TIME TO MAKE A MESS
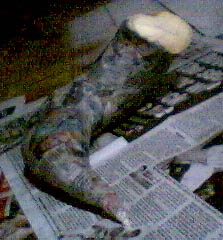
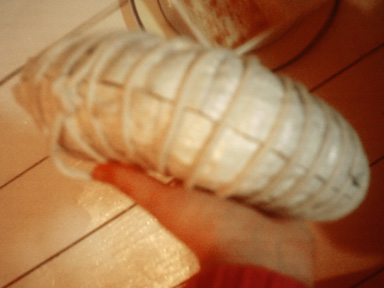
Grab your big bowl, your packet of flour and about half a cup of water. Mix the flour and water together until you have a thick non lumpy watery paste, thick but not dough. Then add in some PVA glue (or marvin medium) and mix it thoroughly. I also added some fizzy lemonade… i know that sounds weird but apparently sugar makes the paste stronger. SO you have this bowl full of gunk. Put a lot of newspapers on the floor and rip the rest of them into short strips. Then slowly, and carefully, dunk the strips into the mixture and wind them around the horns. Repeat this until the entire horn is covered. Repeat until you start to lose your mind, which should take about 2-3 hours of constant layering. You want THICK papier mache. Not thin breakable horns because eventually the foam is going to not be there and the shell that's left has to be hard wearing. I really hate doing papier mache stuff because it takes an age to clean up afterwards. Waaaaaaaaait you think as you notice that your bumps you made with the sellotape winding seem to be for naught and the thick layers of paper cover them entirely! Never fear they do have a purpose.
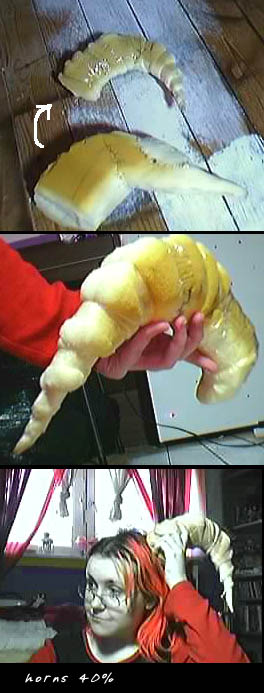
So you have your two paper covered horns, they look ugly and smell like cookies. But don't eat them. Let them dry for a few days. OR! Be an impatient fool like me and blast them with a hairdryer for a few hours then leave them for one day. What may look dry on top will still be soggy underneath. Remember that foam absorbs like a big sponge so your molds will retain moisture for a long time. Best to leave them for a few days and forget about them while concentrating on another part of your costume or learning how to tap dance or something. When you return in a few days you feel a small shred of pride that you past the hardest part of making NiGHTS horns and the rest is plain sailing. You cosplay nerd you.
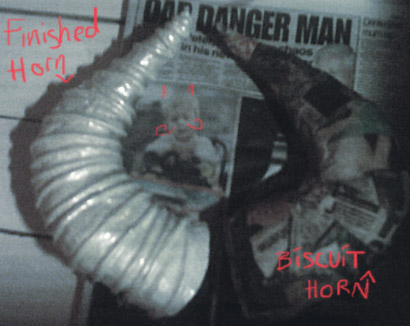
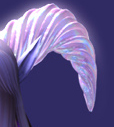
Now because i'm lazy, i only done one horn and only just started making the other one last night, i kept putting it off. So just pretend that in the following photos i have TWO identical horns. Yeah. Also can i just say it's nigh impossible to have two perfectly matching horn shapes, so don't get too frustrated mines are a bit wonky too. Remember my Art motto- GLITTER CAN MAKE CRAP LOOK GOOD. People get blinded by sparkly and ignore the shortcomings. SO as long as you have 2 horns that look somewhat similar, you're fine, honest. Just try to make them the SAME SIZE/SCALE/LENGTH. Wonky curves are fine. So you have your newspaper horns. Get your needle and thread again and wind VERY TIGHTLY like you done with the sellotape down each horn, giving you back your horn bumps. Stitch it at the end so the coils don't just unravel. THEN you get your floor varnish and thickly coat the horns making sure the varnish gets in all the thread grooves (it makes the thread stick). Speed dry it with the hair dryer or leave it for about 40minutes until completely dry. Don't let them get too hot (fire is bad m'kay) and have good ventilation (fumes are BAD for you). Then when the varnish is dry give your horns a base coat of gloss paint in the color you want it. I chose white because U.V's horns are, well, white. So yeah. The painting here doesn't have to be perfect, it just has to give the paper more strength. Leave it to dry. Then repeat the windy thread tactic AGAIN over the groves you made the first time. So it looks like this.
Step 3- Tactful Tissues. Right now you're going to make even more of a mess. You're going to cover all your hard work in tissue paper (the stuff from the bathroom). Use the PVA glue and layer mushy tissue onto the bits of your horn that you think need more definition. Then when you have all the major lumpy bits done finish it all off with another thin layer and completely cover it in PVA glue (use an old paintbrush). It will dry shiny thus adding to the overall hard as nails texture. Cover them in another layer of paint for good measure. Just make sure your thread ridges are still visible. They serve a purpose! Step 4- Make or break time. The part i dreaded. The bit where all your hard work can go completely wrong. Now originally i had decided to just leave them, shove some glitter on and leave them at that, but Blu moaned at me saying the twisty swirl lines going around the horns weren't deep/defined enough. So my horns looked like this. Just kinda subtle ridges—>
Ideally i wanted them to look like Kichi's 3D model horns. Like this.
So it was back to the drawing board, or rather, washing line. Now there was no way in hell i could ever copy the complex multi swirl Kichi done so instead i opted for the next best thing, a continuous single spiral. I asked my mum for her old washing rope. But still there was the PROBLEM of them being way too heavy because the foam had absorbed so much mixture of glue and varnish. The only way they'd be lighter is if i somehow got the foam base OUT and left them hollow. I didn't know if this would work or not, but it does, or at least mines did. I was worried the shell wouldn't be strong enough or would cave in when cutting it up. Hard scary part!- Be very very CAREFUL. Draw a thin line down the underside and top of your horns. You're going to cut them in HALF! So draw from base to horn tip (not across the way). Then taking the stanley knife slice away at the line until you reach the very end. Pull the shell apart and remove the foam. The foam will be stuck in parts with glue or whatever but just snip it with the scissors. So eventually you have two halves of one horn. Cut your washing rope in half, first make sure it's long enough for the amount of spirals you need. Place the two halves closely back together again (throw the foam into the trash). Then insert one end of the rope into the very tip end, bend it back and start to tightly spiral the washing cord back along the hollow shell, letting the thread ridges guide the rope. Use them as tracks. The rope should be tight enough and secure enough so that it doesn't unravel. When you get to the opposite end of the horn you need to tie it once then bend the remainder of the rope into the mouth of the horn and tape it down. You'll find that the rope alone actually holds the cast together. But it looks dumb with a great big line down it so out comes the magical tissue paper again!
Cover the rope and the join line, infact the entire horn, all over again, with generous layers of tissue paper and glue. Use a little tub of water and a paintbrush to make the glue easier to work with, so you get in between all the ridges. You want the rope to look smoothly joined to the horn surface, not like a rope wound around a cylinder. The tissue paper will be what will keep your horn together securely and hide all the flaws on it. To give you an idea of how much tissue i used to cover the rope i went through half a roll. Don't roll it on though! Paste it on in squares using a brush.
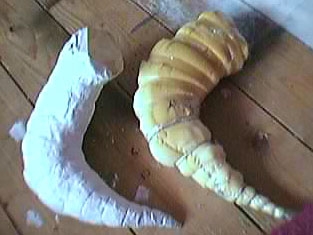
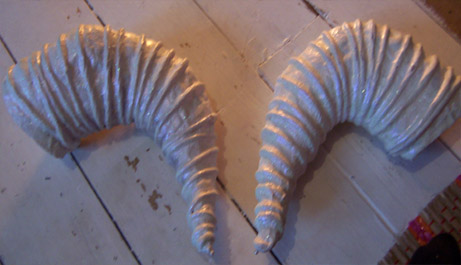
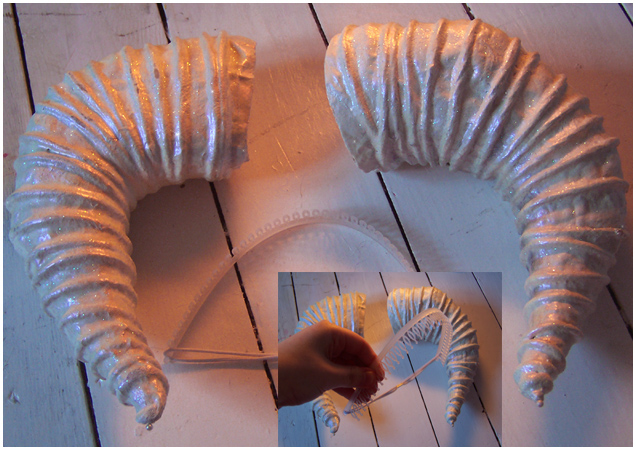
When it's all dry you'll be left with the perfect horn shape to paint and decorate! Step 5- Finishing up.
Give it a final coat of paint, making sure to cover any discoloration and make it look smooth. Then re varnish. It may seem like a lot of layering, but it's all that paint that makes it sturdy and holds the thing together. And yeah (AS USUAL) one of my horns turned out really heavy compared to the other, i must have some kinda symmetry dysfunction >_> At this point you can do the following things while the varnish is still tacky and semi dry-
Whoever thought the above could come from an old sofa, heeehe. The last things i did to complete my creations was i used some old dark blue/black eye shadow and dusted it in between the rope gaps to add to the shading. I also filled the horns with some pillow stuffing to neaten them up. NOW! I shall devise a contraption to hold this entire thing on my head under my wig without falling backwards. I have a few plans already but when i find something that works i shall write up a tutorial on how to do it. This is going to involve a lot of metal hair bands and wire. . . I hope this helped give you a better idea of how i make my horns ^^ It's not that complicated. You just need a lot of patience and a good sense of balance. -UPDATE- Ok now that's all very well, but how the heck do i get these honkin great big ol things to stay on my skull?
So i tried wire. Don't try wire. Trust me on that one. I nearly gave myself a DiY lobotomy. Then i tried stitching the horns to a skullcap… thing, which was nigh on impossible due to the thickness of the horns. Then i went HAIRBAND HUNTING and blessed be, Claries Accessories merchandises small miracles (they were lacking miracles the last time i was employed by them >_>; ) If you go to the neglected section up the back of most stores that sells the boring weird hair bun holders, non working ponytail devices and pointless centerparting zigzag stencils (oh god) You'll find one of THESE wonderful things that you'd never buy at any other time in your life BUT for NiGHTS cosplay. Honest.
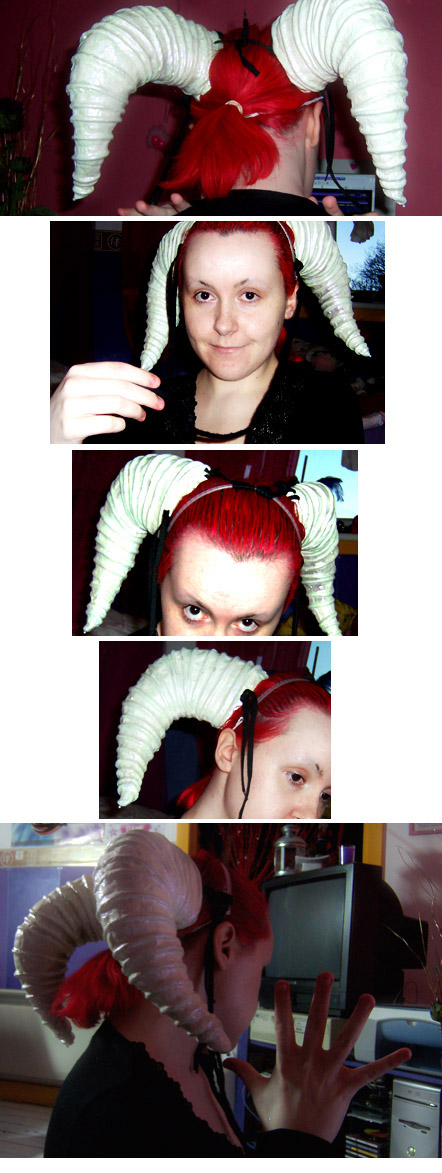
Then you take your 4 shoelaces, stab holes in the tops and sides of the horn bases and tie them to the plastic part of the hairband. I won't lie, it's not the best setup in the world and the weight hurts your scalp. Backcomb and hairspray your fringe so the comb slides through less (you don't want them to slide backwards). Then you end up with magical 'hah TRiP defied gravity' funhouse horns! It's IMPORTANT that you wear your hair back in a ponytail as that's what gives the hairband extra support.
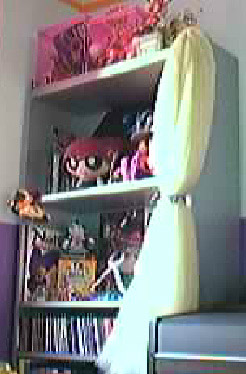
Now you figured out that part. Now is the part where you mess with the hideous world of BIG HAIR. HAiRSPRAY Buy your wig. Buy the most expensive wig you can afford, otherwise you'll end up with a £15 godiva wig that's made out of crimped plastic, looks like hamster bedding and hangs like a fat pair of curtains.
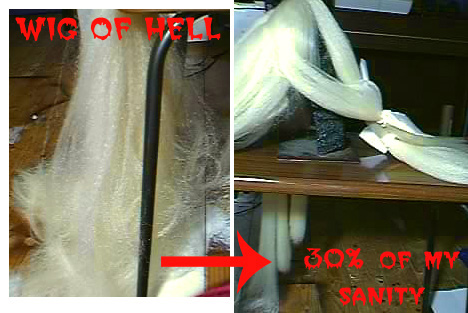
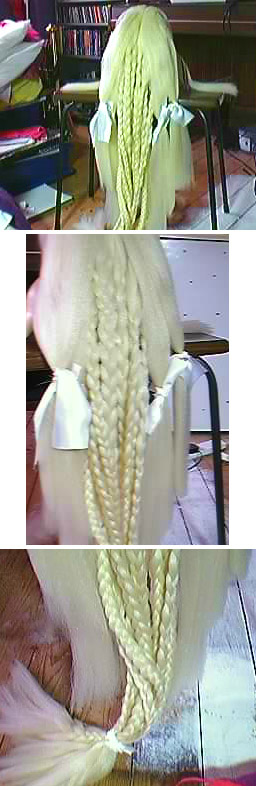
People pay up to £200 for a decent cosplay wig, i would have too if i'd known how rubbish this wig would be. But even though i was horribly disappointed i decided to try salvage it and turn it into something pretty and sparkly. Take heed! Sometimes you can make bad into good. Now i don't have any hairdressing experience or skills other than cutting and dying my own hair since i was a kid, but it's simple enough to give a wig a good trim in sections, thin it down and cut it into layers. You'll need a wig head, or a… whatever to put the wig on, or get some poor sibling to wear it while you work on it. Don't cut off their ears. That would be bad. I used a statue Blu gave me. Shh. Separate the entire wig into long sections, lots of them, and tie them with fabric/ribbons to stop them being mixed up. Using hair-elastics on a wig will make it messy and tuggy. Tie it instead. Get a non plastic comb (plastic causes static and frizzies) and work from the bottom to the top. Use the end of the comb to unravel knots instead of yanking away and tearing chunks out of the wig. It helps if you use hair oil or frizz gel or something slightly greasy on your hands. The wig wont absorb it like real hair would (plastic isn't hair), but it makes it easier to work with. And on the theme of PLASTIC ISNT HAIR. Pay attention. Don't use heated hair appliances on plastic wigs. It will melt, clump, go on fire and waste your entire project. Plastic styles with hairspray and wrapping hair tightly in curlers for a few weeks with hairspray. Don't treat it like real hair. It's barbie hair. All you need is a lot of patience and a lot of hairspray. Speaking of patience.
Even the most hopeless wig can be turned into a thing of beauty.
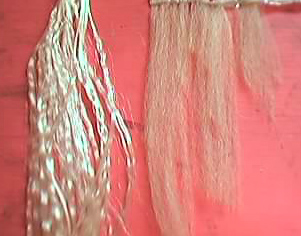
Tips on choosing a wig to work with would be, the cheaper it is the worse it is. A godiva length wig shouldn't be under £50 if its good quality. (afterall more hair= more money). If buying on Ebay only buy wigs that have closeup photos, you should be able to see the hairstrands defined and slightly glossy. If the hair all blends into one big straight cut blob you know its a bad buy. Here's an example of wig fibres.
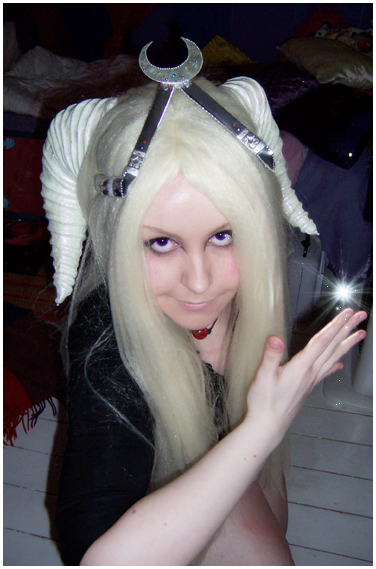
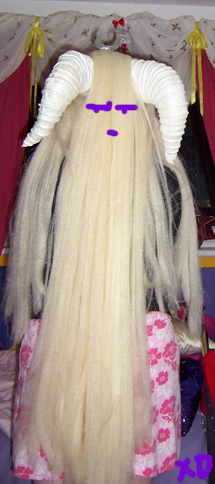
The unrealistic frizz on the right is my wig. The hair on the left is high quality hair. You can also buy human hair wigs and extensions but the price for human hair is madcrazy and you can end up paying over £300 for a full wig. Extensions range from £20 upwards. Make sure you shop around and know the bad from the good, otherwise you'll be wasting money. If you have long hair and your wig is short or medium length, wear a wigcap! And always gel down your hair under the wig. Don't be afraid to attack it with long hairpins in order for it to stay on your head. Now getting back to the horns you need to do something crazy and possibly hazardous to your beloved wig. You need to slice two holes in the back of the scullcap and then push the horns through, leaving the hairband contraption on the other side. Putting all this onto your head requires a LOT of effort, patience and some mild discomfort, but then you get exactly what you want-
I hope that sheds some light on the wig thing. Just use LOTS of hairspray. And if you're having problems styling a wig then be sure to visit Cosplay.Com's forums for advice. |


Tutorial © of TRiPPY.
[ BACK TO MAIN ]