Archive for the ‘Artwork’ Category
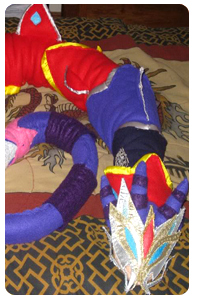 We've got a few nice little additions to the site today in the shape of 3 new wallpapers, 1 new craft and 2 new handmade plushies. Quite possibly the most hard2thecore plushie I've seen yet, Alkerone only went and recreated Dragon persona NiGHTS from fabric and it's massive!
I've been seeing more and more NiGHTS related plushies and dolls pop up on D.A lately so be sure to submit them in our forums if you'd like to see them on this website ![]() Remember that the plush section is for handmades only, official collection toys will be in our Merch section later on. I'd love to see more fan-made plushies of all the boss Maren… Bella anyone?
Remember that the plush section is for handmades only, official collection toys will be in our Merch section later on. I'd love to see more fan-made plushies of all the boss Maren… Bella anyone?
|
|
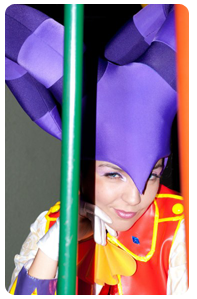
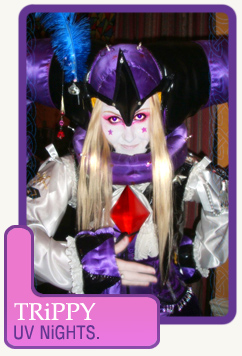
A new photo set of 15 images has been added to the super talented Lelis' NiGHTS cosplay gallery. You can view the updated gallery [ HERE ] More cosplay/general site updates to come as I rid my PC of duplicate files, which yes, months on I am still trying to sort through *lol*. |
|
|
|
Meet location: Anime Detour – Minnesota USA
Date: April 23-25th 2010
NiDcom regulars who attended: Infractus, Zero-Shift, Level 99, Andersam, Sierra
Level 99: Oh, I'll write up my full report over the coming week, but first…
Duh dunnn……..
Duhh dun dun dun dun dun……
REEEEEEEE REEEEEEEE REEEEEEEEEEEEEEEEEEEEEEEEEEEEEE
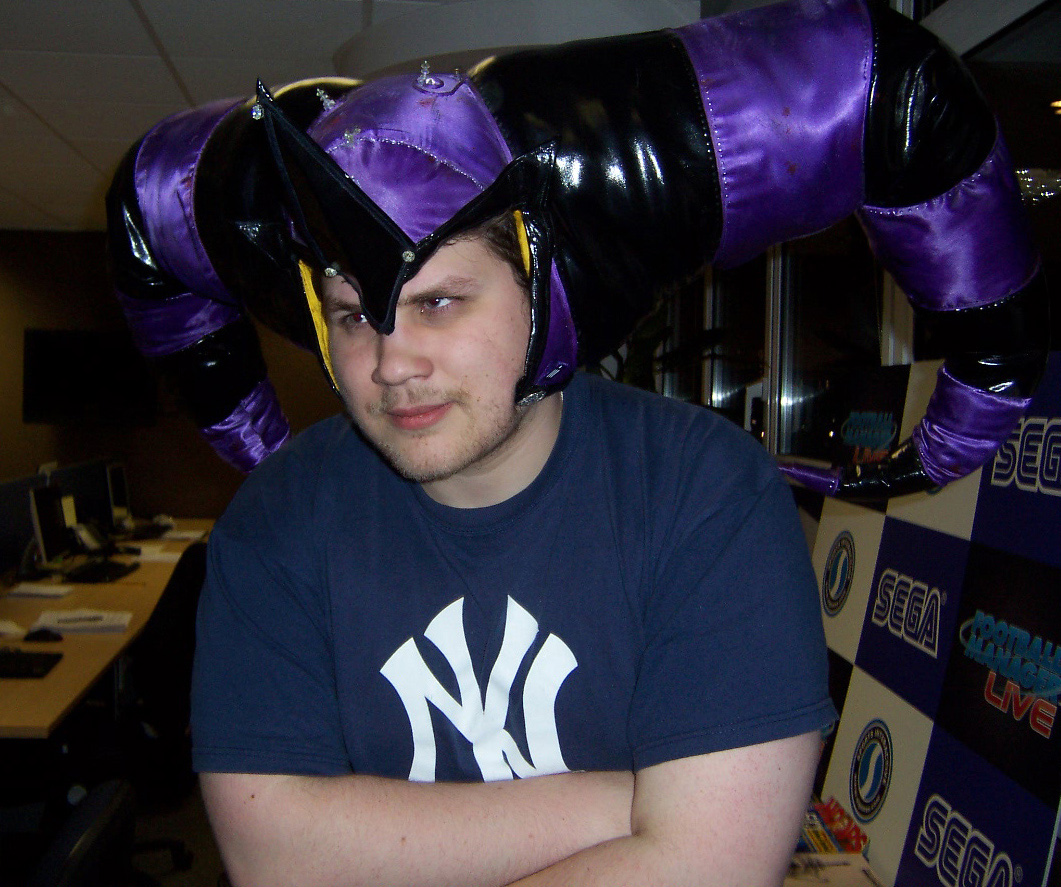
Also, I think I win, hands down:
IT'S SO BAD YOU COULD HAVE NEVER IMAGINED IT
-To continue reading click the button-

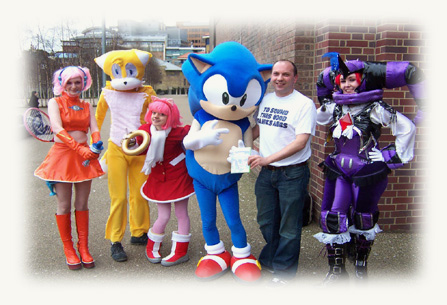
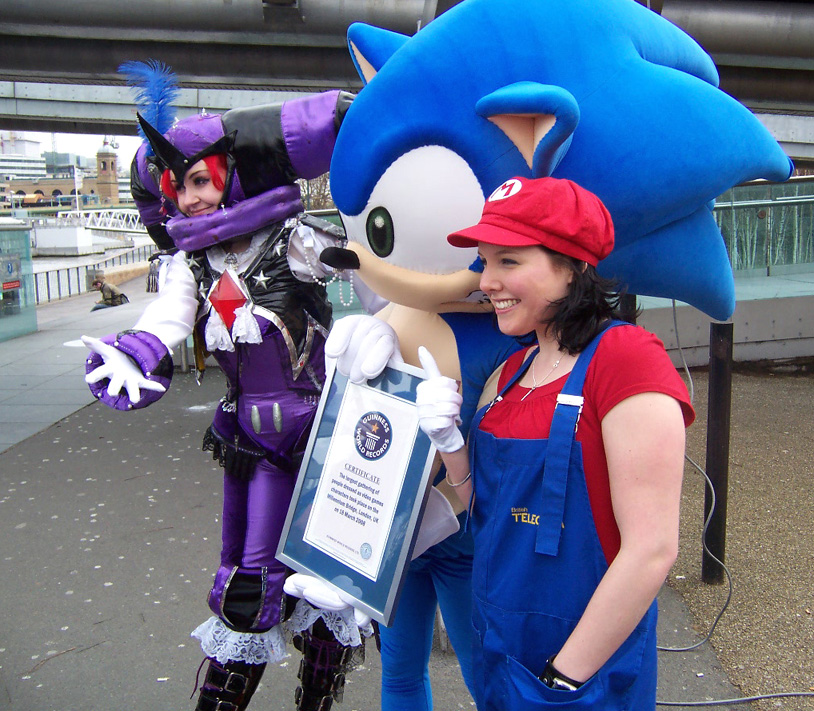
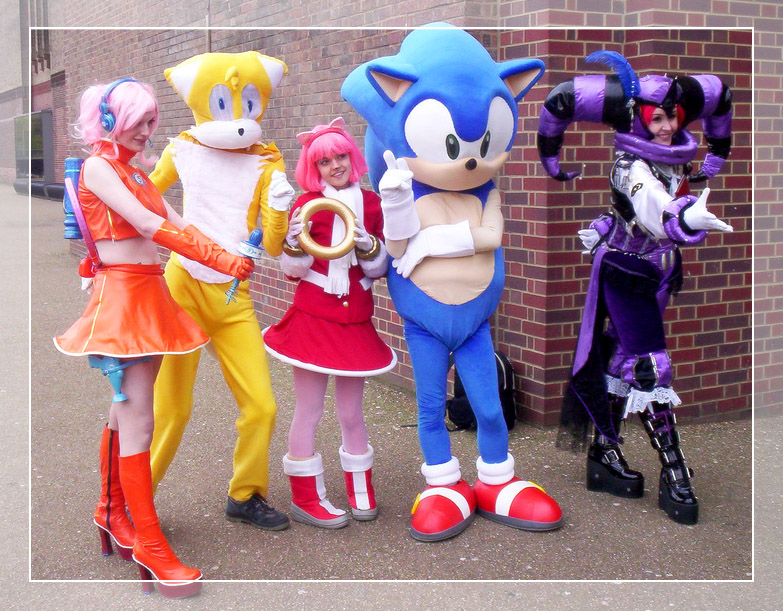
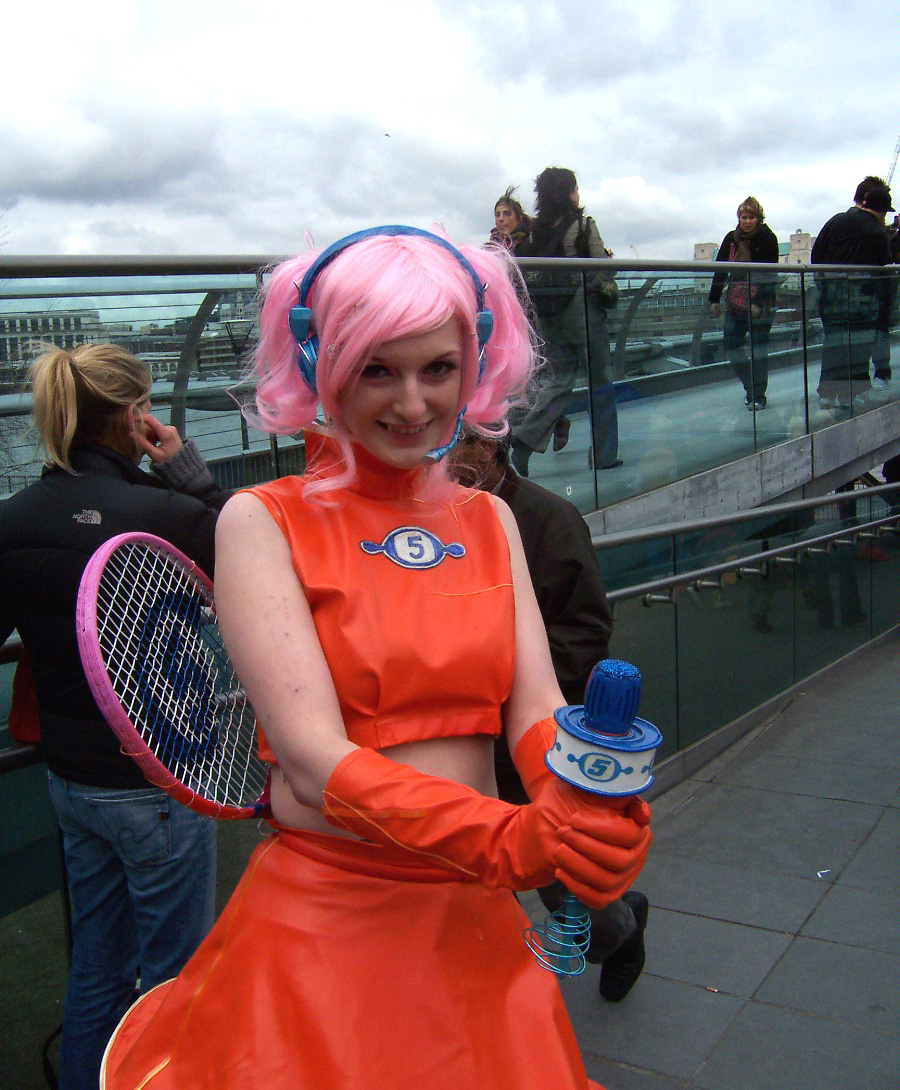
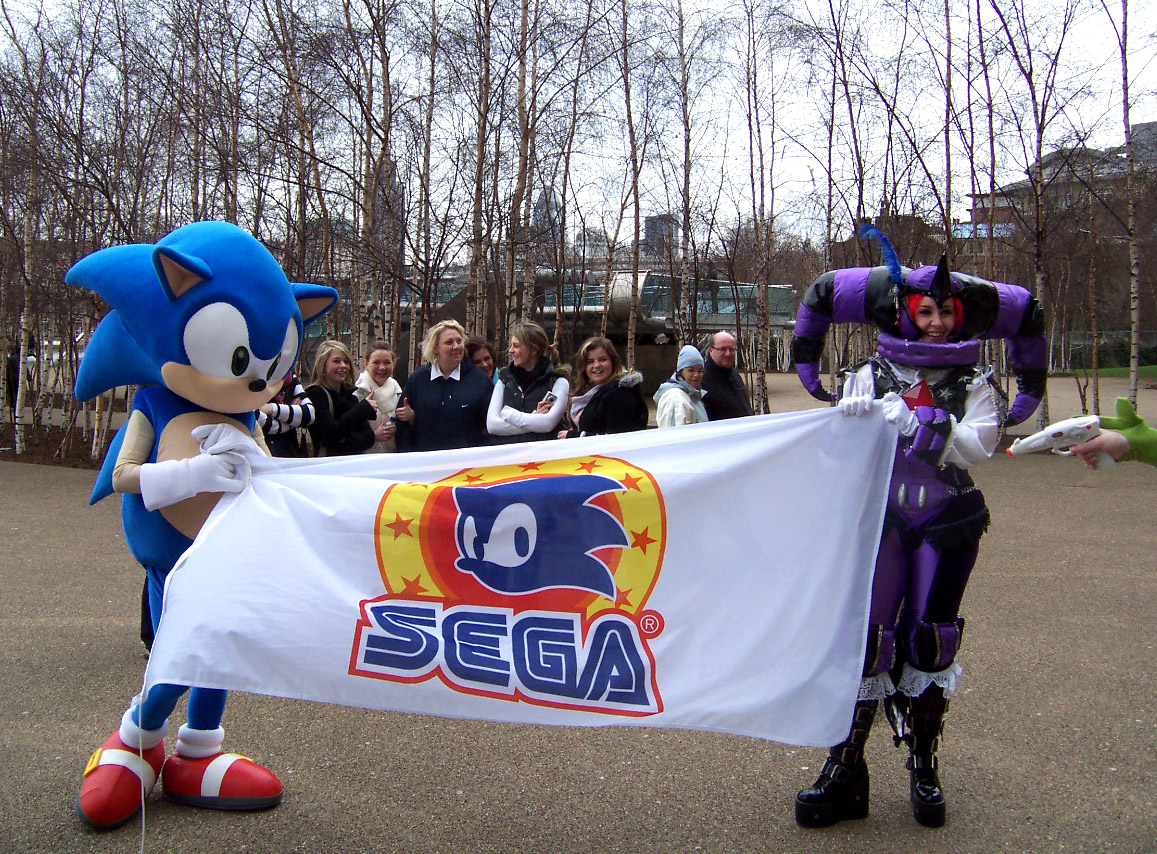
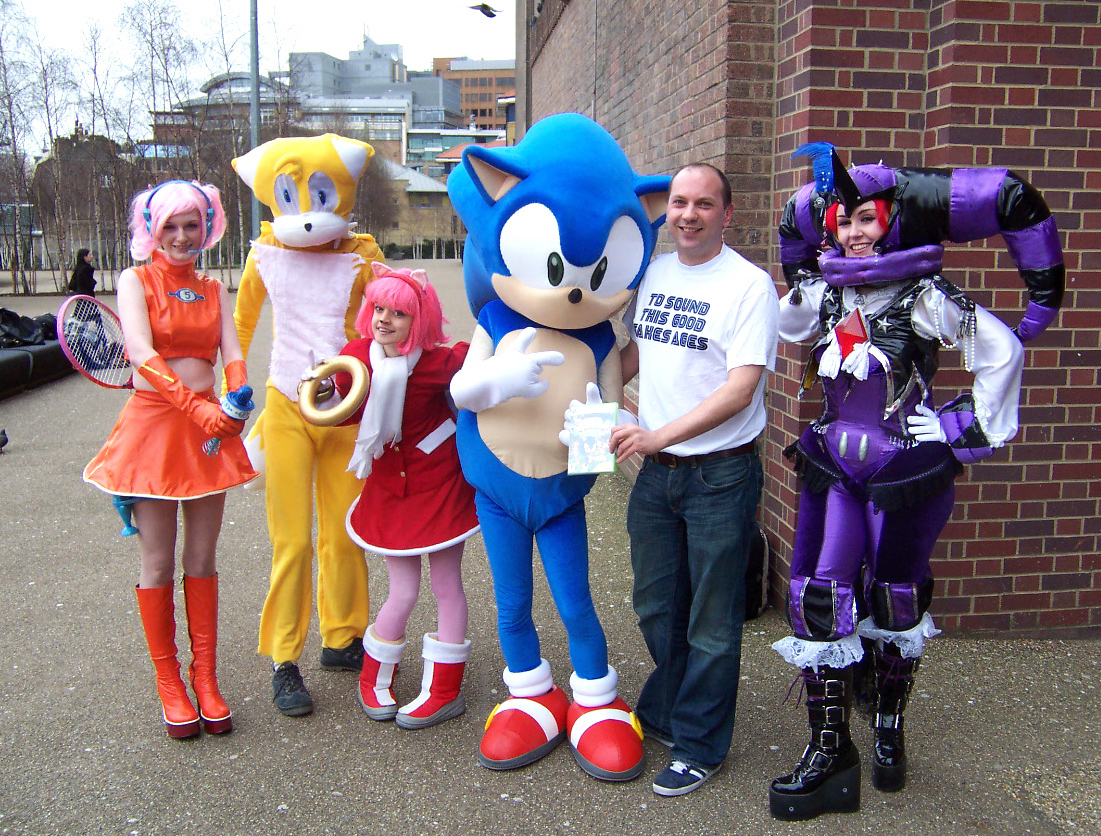
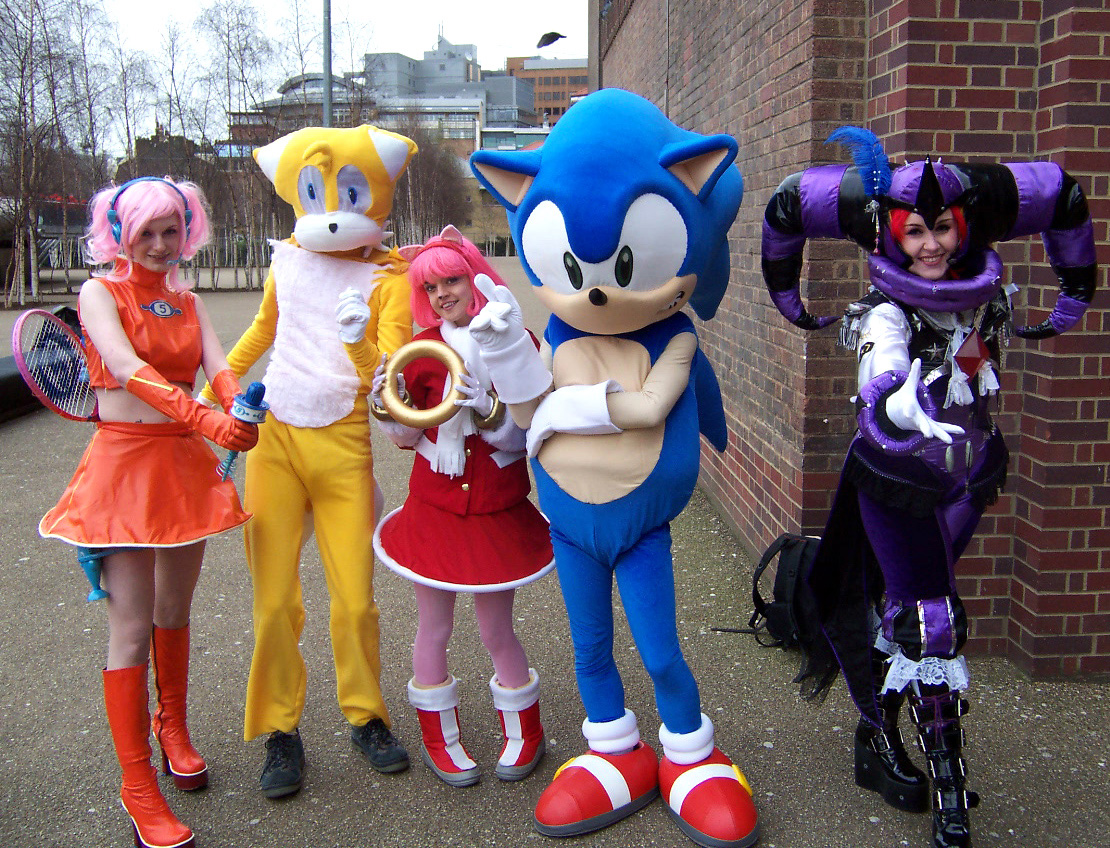
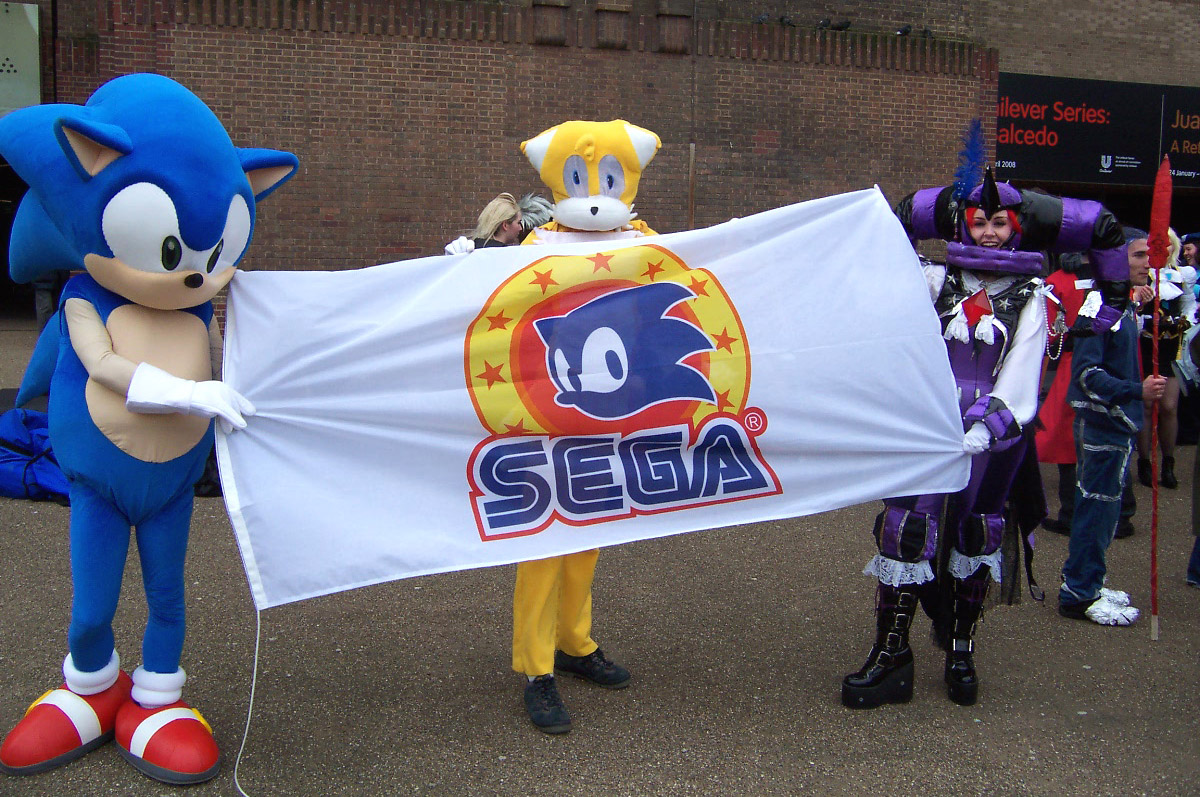
March the 18th 2008- DiGi and i were invited by SEGA to come down to London and represent them in a large Guinness World Record attempt. The record chosen to set for future cosplayers was 'The most Games characters gathered in one place'. An easy record to beat since no such record previously existed! Hah!
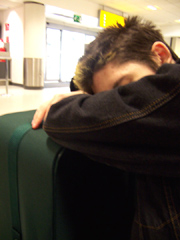
What unfolded in those 24 hours was perhaps the most fun I've ever had on 48 hours insomnia. Besides… what kind of SEGA fanboy would you be if you could soundly sleep in SEGA HQ? I kept having to pinch myself and check DiGi wasn't just a hallucination brought on by the inflight meal.
From finding out Sonic hides Scottish heritage to being gatecrashed by Richard Jacques. Singing Sonic R songs badly late at night, being on TV and DiGi getting nekkid under a bridge… it was the stuff of DREAMS.
So here is the essential NiD.Com Guinness Report! Enjoy.
Forged documents. Check.
So Sunday night we were phoned by ArchangelUK making last minute checks with us about our flights, what we'd be doing etc etc. It was at that point we were informed that BBC 1's children's Newsround was also going to be in the media crowd attending. This of course made us laugh our faces off because DiGi had just had to study the show for his college course and my brother thinks Lizo is THE MAN. (Newsround is pure 90's British nostalgia). Suddenly the rumor that the famed Paul O'Grady show was going to be there seemed small in comparison to the MIGHT of NEWSROUND. C'mon! So with this in mind we continued packing our suitcases and skipped dinner entirely. Probably not the best of ideas.
That night I'd gone to bed super early… like some kid at christmas willing time to go faster. DiGi however had just signed up for a subscription on Phantasy Star Universe (AotI) and sat up to 3am hitting ugly things with sticks for money. He then came back to bed at said time to tell me i had an email. I get a lot of emails. This one however was from my pal Jess so i sat up in a drunken haze to read the thing. I returned to bed to find i couldn't get to sleep again. So for the remaining hours spent in bed i stared at the ceiling trying to think of a million witty things to say to reporters who might ask about my costume or NiGHTS. I swear i had a ton of them. Like how to promote NiGHTS in under 10 seconds using flowery words like 'unique' and 'masterpiece'. Needless to say i forgot all of them by the time 9am came around.
Up and at 'em DiGi dear!
We waited for what seemed like an eternity at Edinburgh Airport for our mysterious BA flight to appear, only to realise we were so early the self service machines wouldn't let us check in and then proceeded to malfunction. Cue some sleeping and sitting around for over an hour. There was an incident at an 'EAT' cafe where DiGi tried to explain his real name to a woman bringing us a cheese sandwhich… who i think just chickened out and saved her grace by waving instead of shouting. Pity really, the pair of us get cruel lollage from having crazy surnames to torment people with.
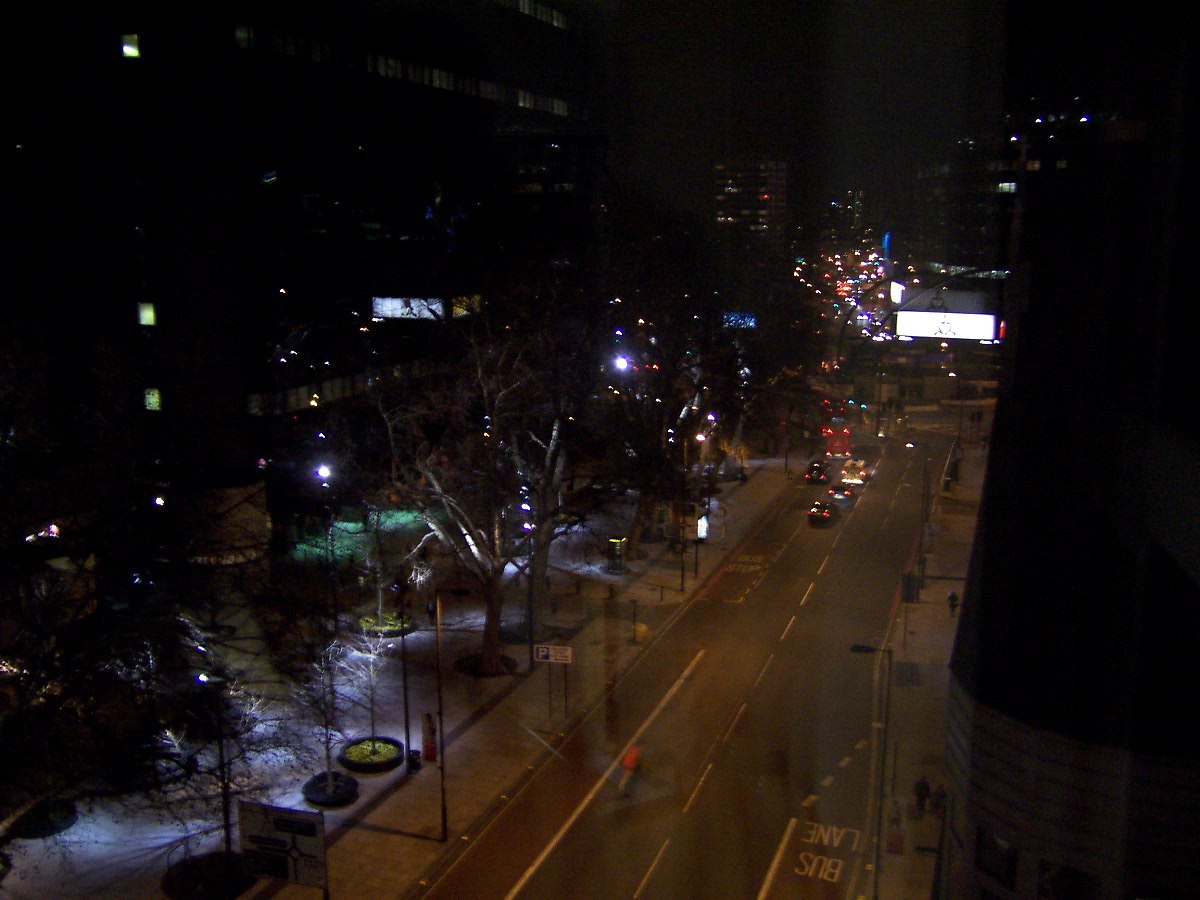
One bottle of caffeine later we were on our merry way! On takeoff we were treated to the most amazing view of the River Forth as the sun cast big shadows of the bridges across the water. It's an odd thing sitting on an airplane munching on a sandwich above the clouds at sunset realising that SEGA are paying for you to be a few thousand feet in the air (It's at that point you get worried lol). That sort of set the mood for the rest of the trip really, SURREAL.

Like i said. Surreal.
![]()
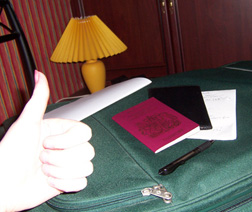
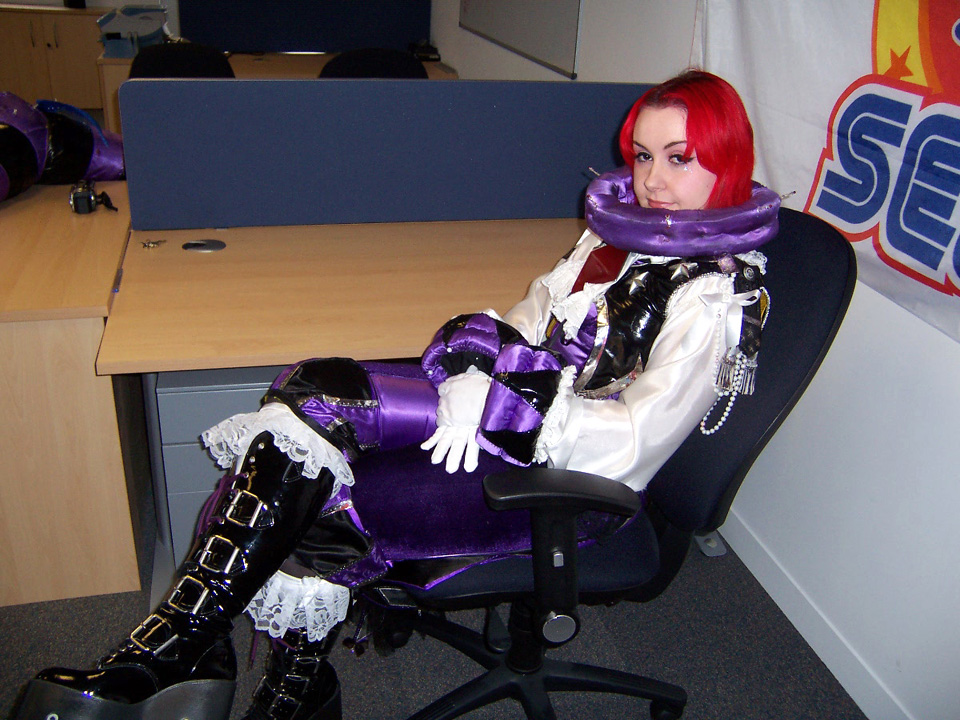
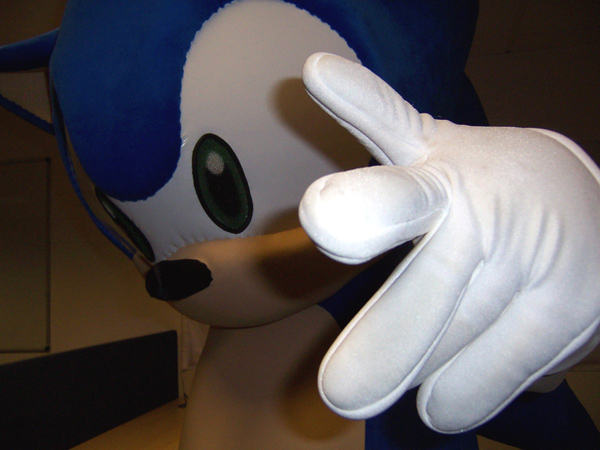
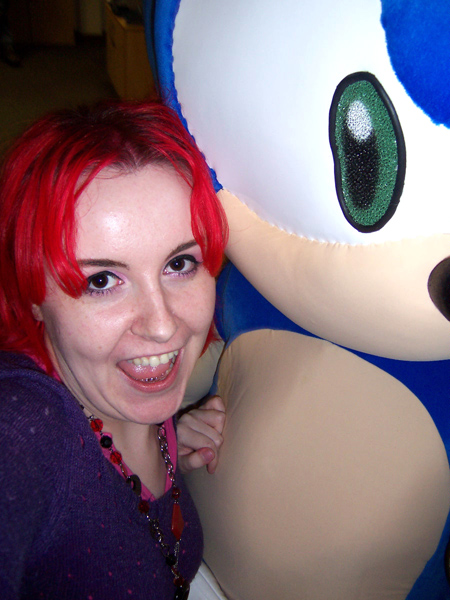
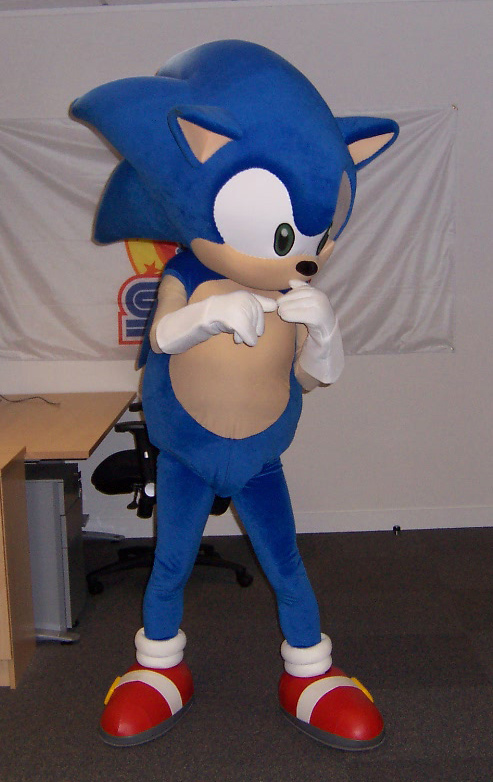
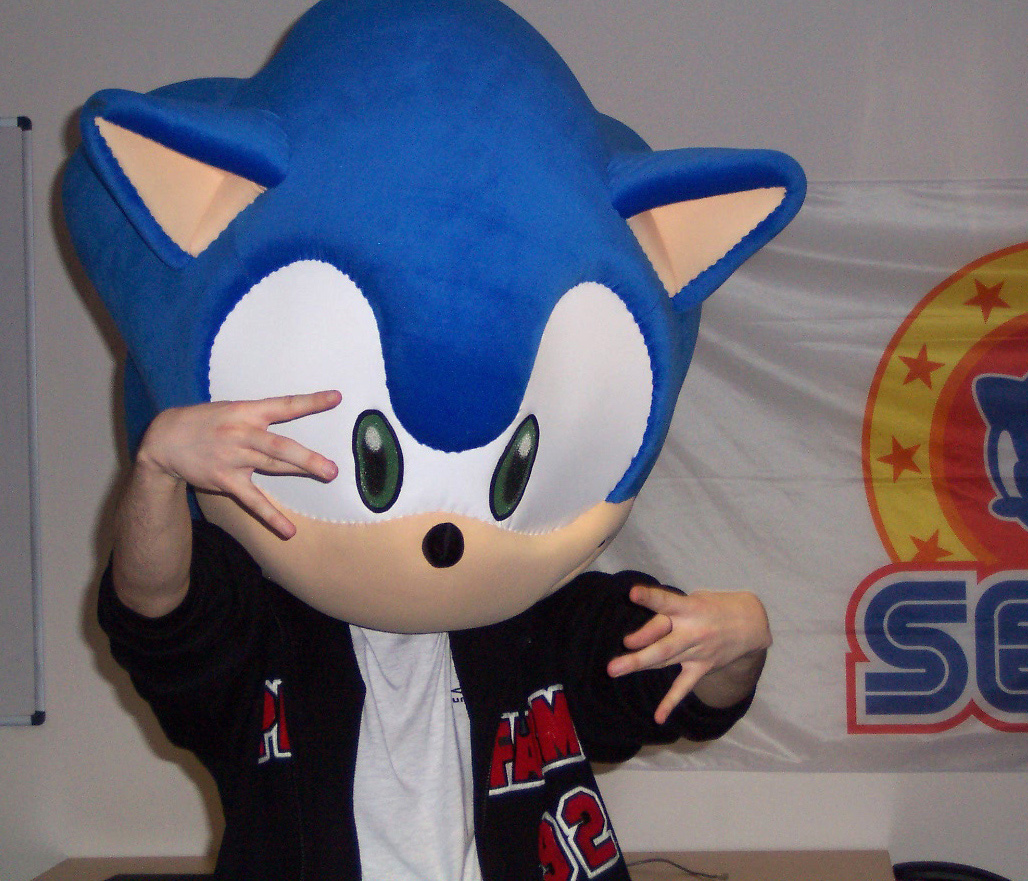
After much running down subway tunnels and a crazy amount of trains… no REALLY we found a train in a WALL at the airport!, we arrived at SEGA HQ. Immediately it became obvious that compared to other offices I've seen- this is a place where WORK gets done. I could tell that by the mini golf setup on the floor. Arcane scribblings on the walls, sacred Virtua Fighter plushies… A COPY OF THE HURRICANES ON THE MEGADRIVE. These folks mean business! Joking aside i was very impressed. The urge to go all-out ninja and dig for an beta of NiGHTS 8 the second Kevin turned his back was very tempting, but we were distracted by the decapitated head of Sonic on one of the desks. I then proceeded to steal Sonic's shoes for a bit… which actually didn't look too weird on me (should i be worried?).
Much talking and laughing was done, then we ended up creating something of a veritable monster of a podcast show for you folks. LIVE TO AN AUDIENCE OF ONE! Poor Echohawk… XD Anyhoo, the podcast is now available for download down at the media section on this page. It involves hilarious singing and harassing various members of the Sonic community to ask us questions via MSN. I don't think an anonymous 'WHERE IS JACKLE DAMMIT?!' to Iizuka would have went down so well a second time. So that didn't happen, but it's fun all the same.
After all that talking we were pretty parched so took a magical trip to the SEGA kitchen. Yes a kitchen… but not just ANY kitchen… this kitchen has GEORGE FOREMAN GRILLS. TWO OF THEM. DiGi instantly flew into a fit of jealousy as see, his life ambition is to own such a wonderful piece of kitchen godmodery. Also, SEGA seems big on recycling, in every room, kuedos SEGA, save those trees!
Anyway, just before DiGi and i tried to catch 40winks i had a highly amusing run in with one of the latenight cleaners in the mens bathroom (who i felt obliged to say HELLO to since i was probably the only woman in the entire building, with red hair, in a trenchcoat, lol). As i skuttled to my chair for the night i suddenly became paranoid that the office was haunted since A- it was so cold and B- The radio in the main office had turned itself on for no reason. But spooky thoughts were quickly replaced in my brain by the LARGE LOOMING MEDIA EVENT that was taking place in under 6 hours.
I started getting dressed at about 4:30am just to be on the safe side as knowing my luck my costume would explode/burst into flames/stop fitting me after 24 hours. Unfortunately i was ready about 3 hours too soon so we sat watching the World Ping Pong Championship on the big plasma TV at the end of the room. SEGA have a thing for pingpong i swear. It was in these bizarre early hours of the morning while half asleep i decided one day I'd work here come hell or high water as it was such a nice place. With a George Foreman Grill. I could totally man the kitchen.
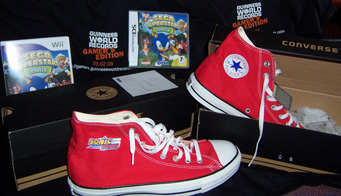
I could also totally clear them out of cool shoes and merch.
I had only just started to nod off when the first manager type person walked in the door. The sight of the three of us drooling in our sleep, a decapitated Sonic, suitcases all over the floor and NiGHTS with what looked like a hangover probably woke him up pretty fast. He was a nice guy, pleased to see we were helping out and quick to tell us the big boss was due in in the afternoon. Needless to say getting to say hello to Mike Hayes whilst dressed as NiGHTS, representing you guys, would have made me look like a fruitcake with a slice of lemon on the side, so luckily we left the office a little bit earlier than we should haha. It was really funny walking down SEGA's corridor to the lift dressed as NiGHTS, i got some priceless looks. But everyone seemed really laid back and nice. Sort of what i imagined the offices at STC Fleetway to be like when i was 12 and didn't realise what offices were actually like. Pfft.
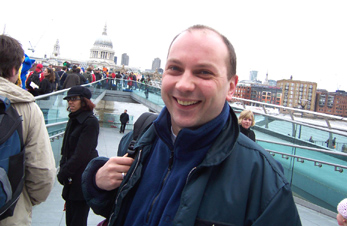
A lot of subliminal marketing to the confused general public of London, walking and trying to keep my balance later, we found a Taxi and were whisked off into a chilly Tuesday morning.
![]()
Our enthusiasm knew no bounds. We got there over an hour early! Sonic (bagged and tagged) took up all of the room in the taxi so i was happy to get out and walk again. Even if it WAS freezing and windy and right beside the River Thames. I'll be honest, standing outside of the Tate Modern gallery it looked bleak… we were the only ones there. The situation was becoming funnier as tourists walked past waiting to get into the art gallery behind us. I'm walking art baby! But i figured the more confused people got the more they'd remember NiGHTS, so it was all good. At one point it became so windy we used Sonic's bodybag as a windbreaker, it didn't do much, so i gave up and put my hat on. Rendering myself deaf but toasty.
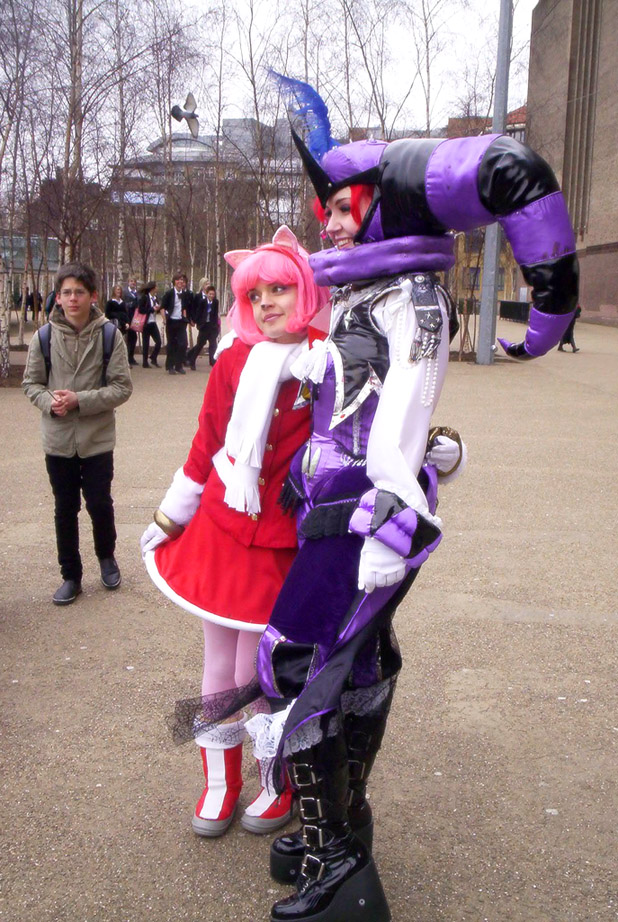
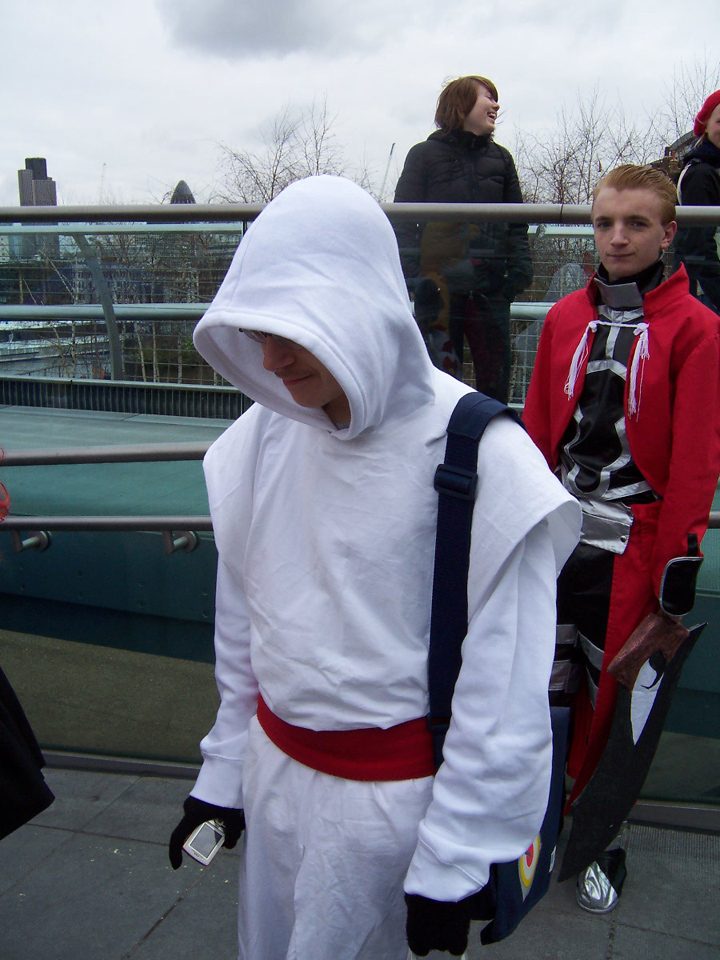
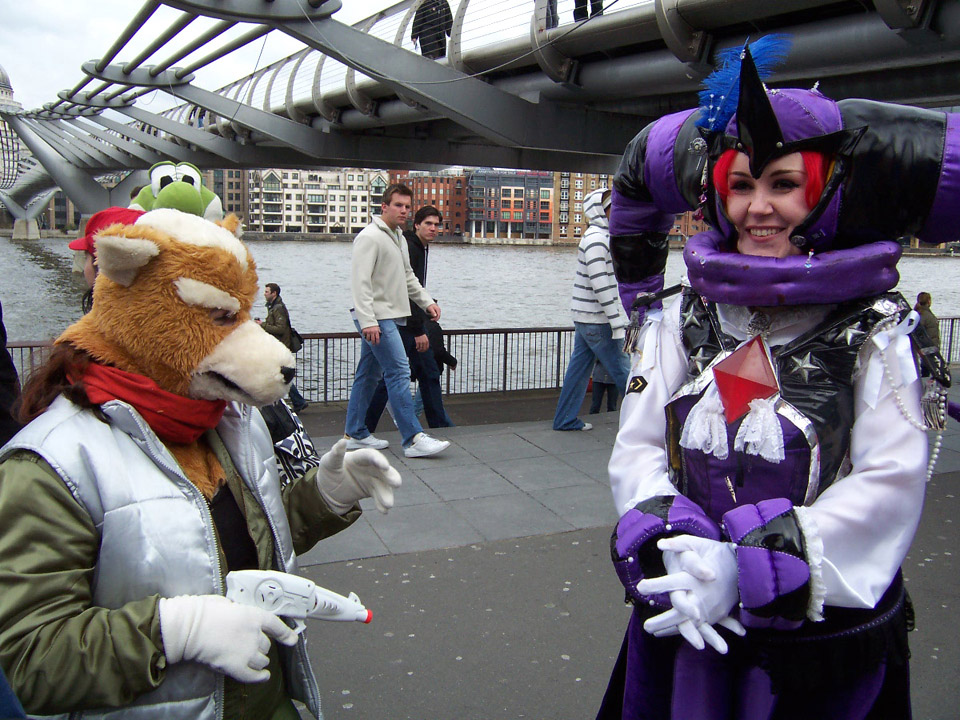
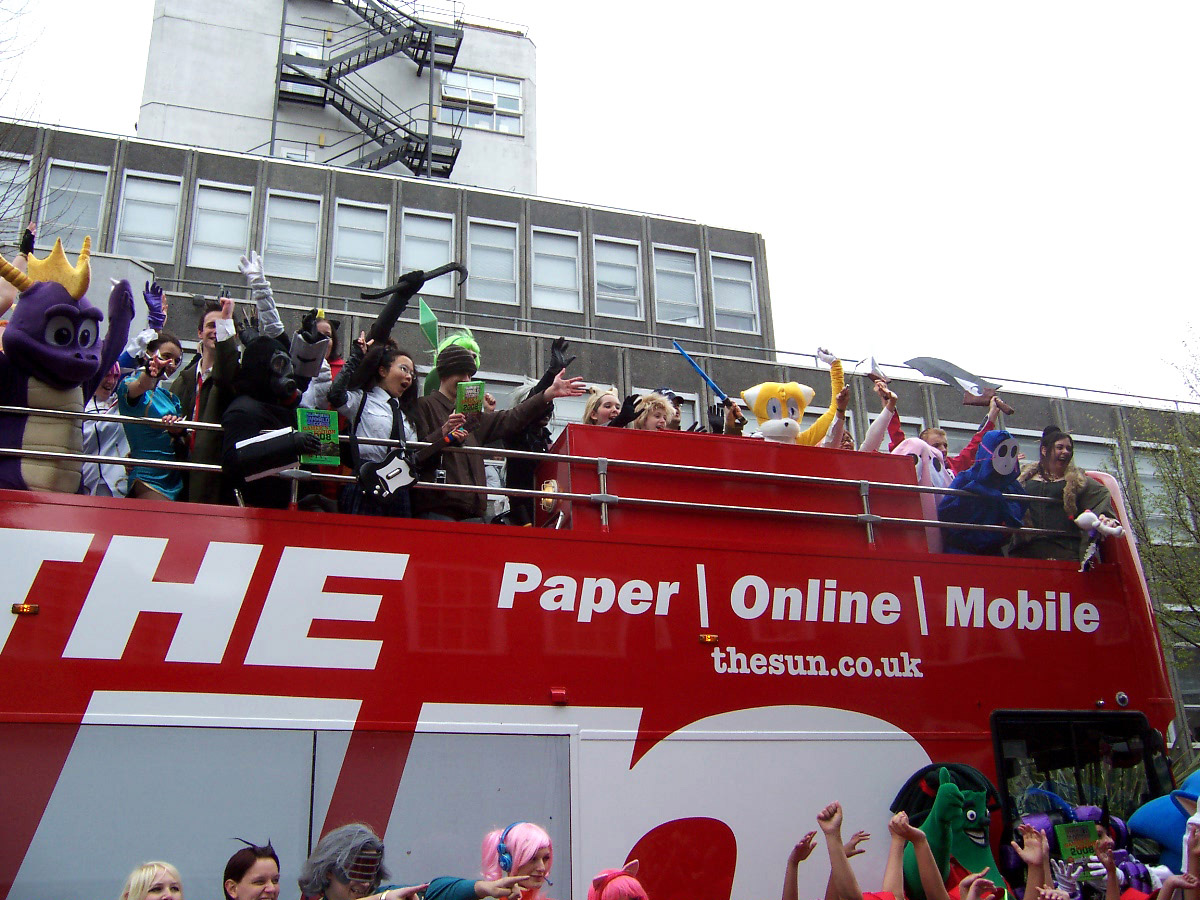
And then LO! From out of nowhere a nice young chap sat beside us and started to get changed into a costume. SCORE 1 FOR TRiPPY. I'd been trying to advertise this event in any way i knew how… so this guy was like finding the golden fleece. We all turned our attention to the Millennium bridge, keeping an eye out for anyone in large dayglow costumes. Often mistaking members of the public for cosplayers who were just wearing mad coats. One by one our little group got bigger (and more hyperactive). We were then bestowed with the presence of Mr Gordon Freeman complete with crowbar in a bag. Then it all sort of got VERY busy in the space of 15 minutes with cosplayers turning up left right and center! It's amazing how friendly cosplayers are, nobody seemed to feel left out or awkward, everyone was just having so much fun!
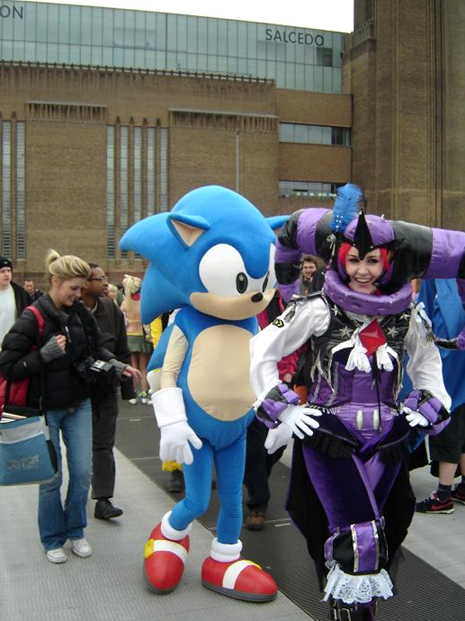
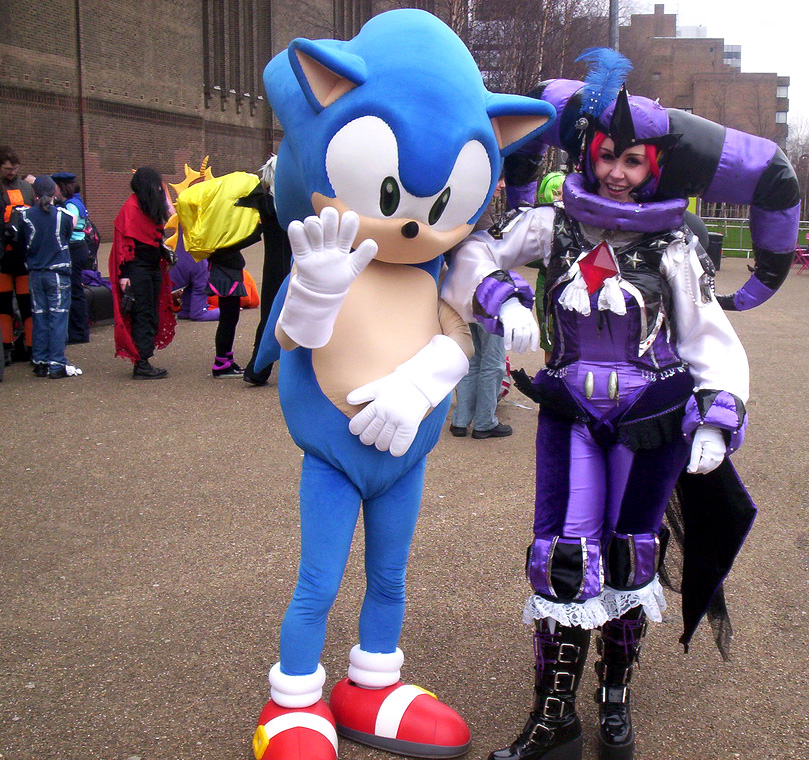
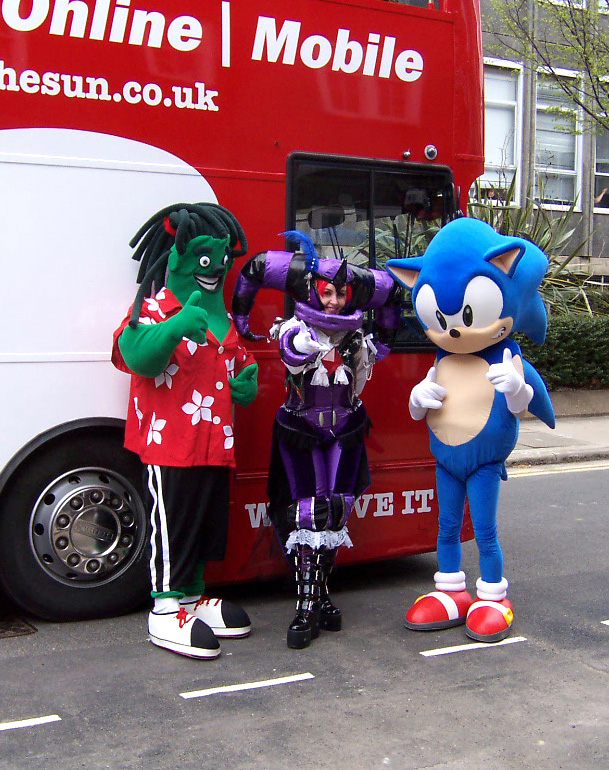
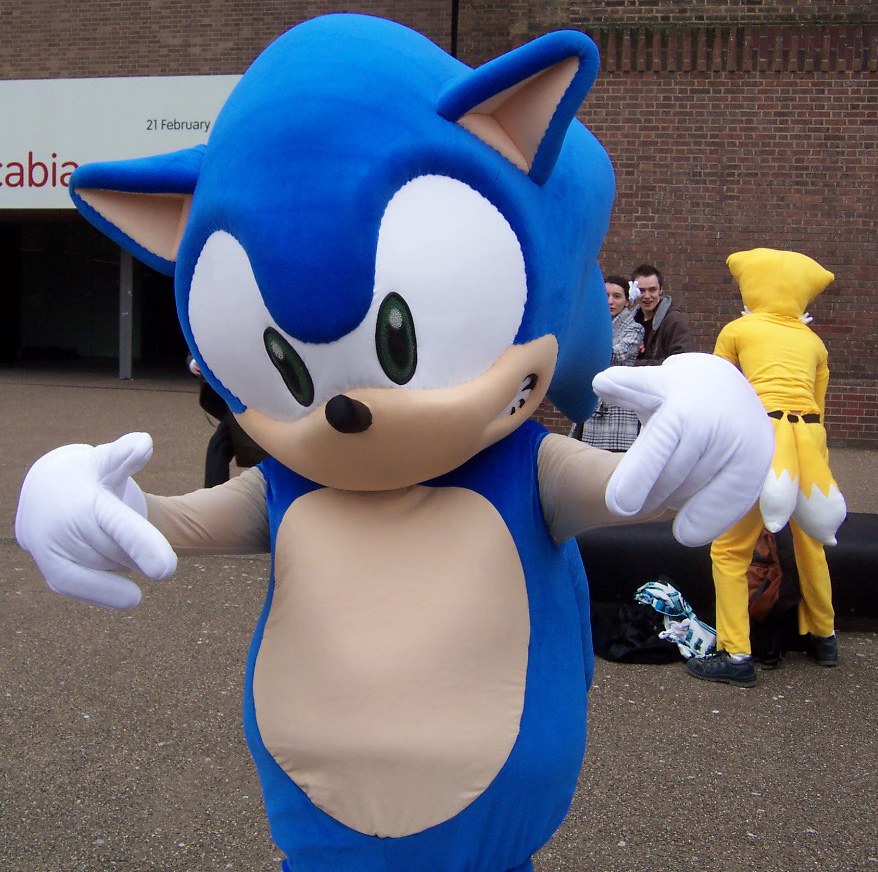
At around 11am Guinness turned up along with various members of the press. But… the Sun bus was nowhere to be seen. DiGi started to look positively mortified. There was no way he could get changed into the Sonic costume inside the Tate Modern… so we had to be RESOURCEFUL. I think the resourceful came from Arch' as it involved DiGi getting his kit off a few feet away under the Millennium Bridge XD; Sonic really IS the fastest thing alive when its a breezy day in London and he's wearing boxers. Fastest costume change EVER. As soon as we walked back to the cosplayer crowd he was instantly mobbed by fans wanting photos.
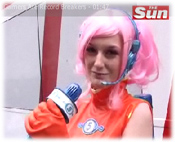
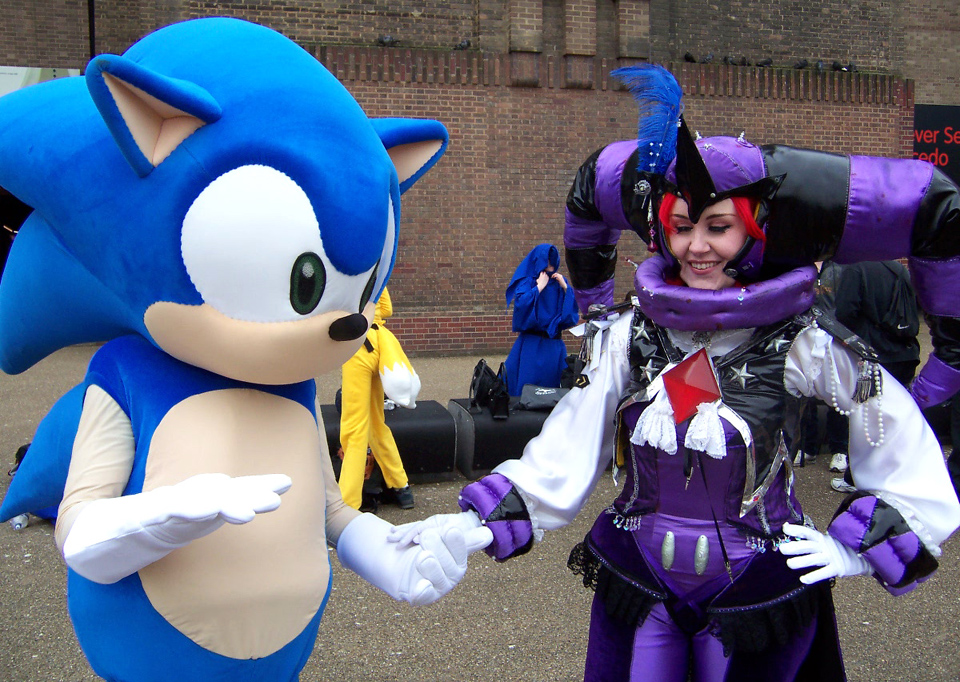
The next few hours were a colorful blur of posing for photos, being interviewed by magazines and nearly having my chest gemstone snatched by overcurious Final Fantasy cosplayers. Shiny is hypnotic.
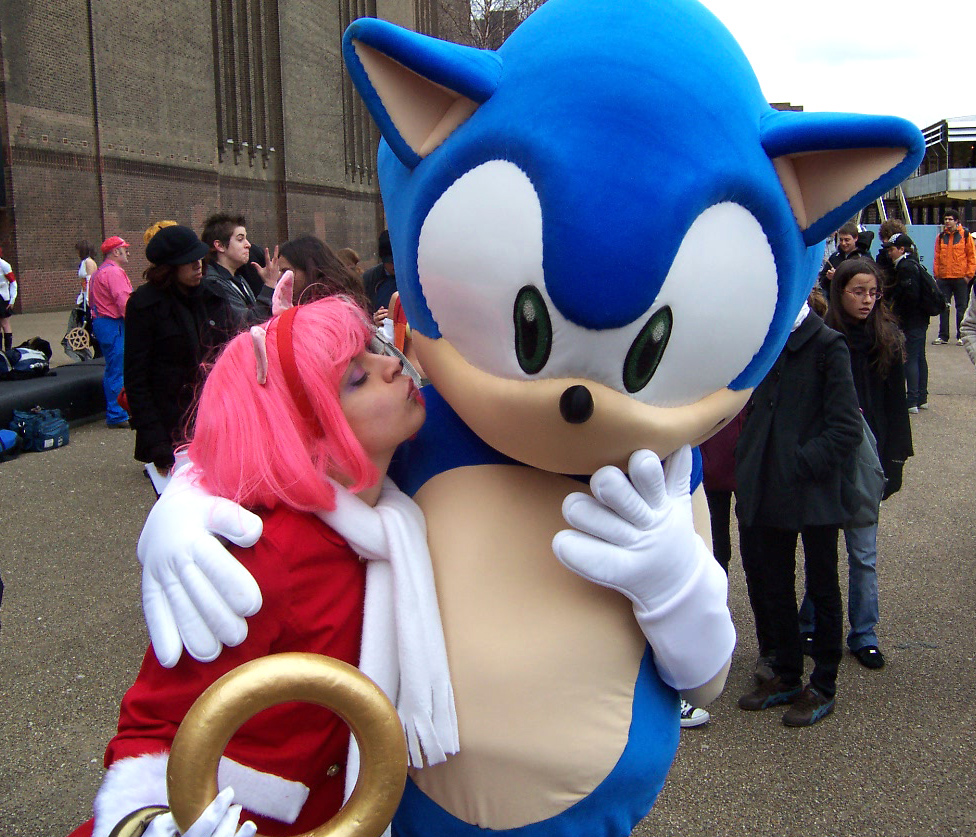
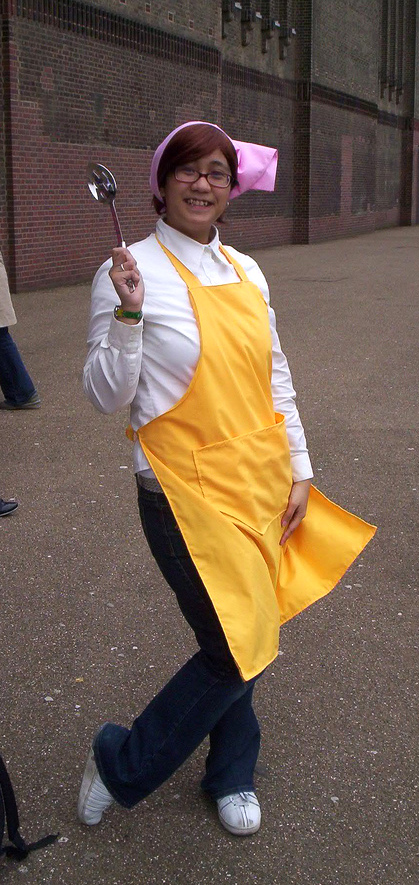
When my fellow cosplayer Orihime turned up dressed in her infamously cute Amy costume i skipped over to say hi… completely OBLIVIOUS to the fact I'd left mute DiGi standing with Mr musical manlegend Richard Jacques. Well it's not every day Richard Jacques teleports out of nowhere to say hello. I recognised him instantly but because i was so tired i think my brain was telling me he was something of an illusion along with the 80something game characters jumping about.
LEGEND
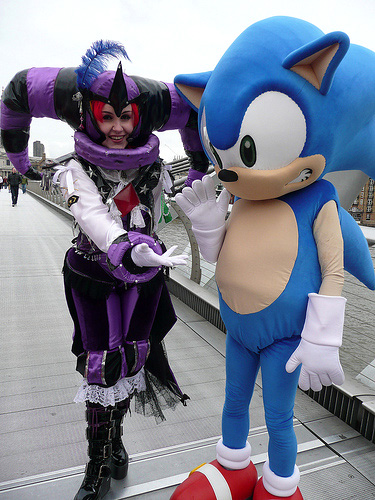
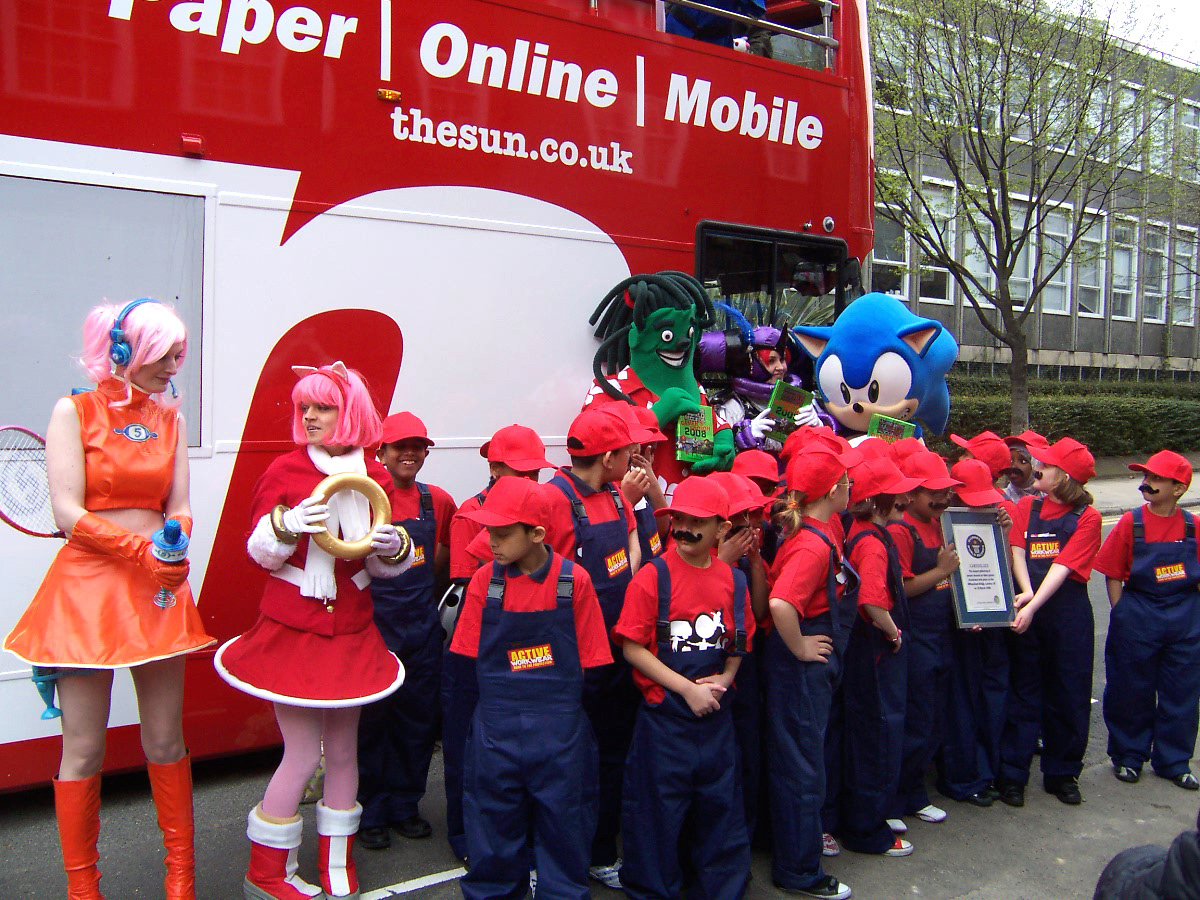
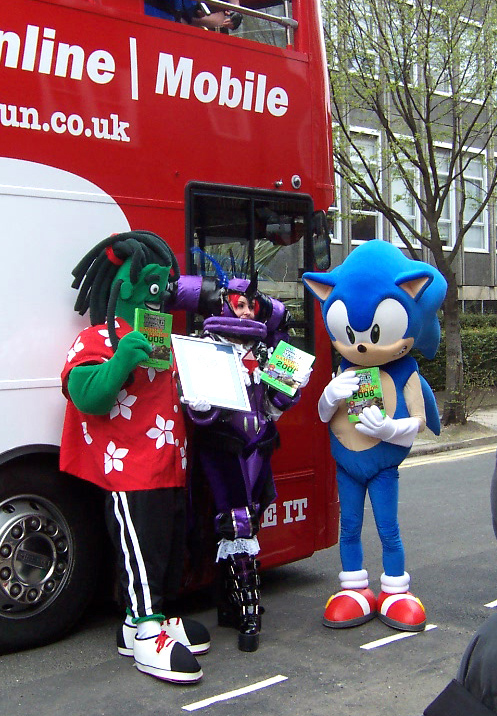
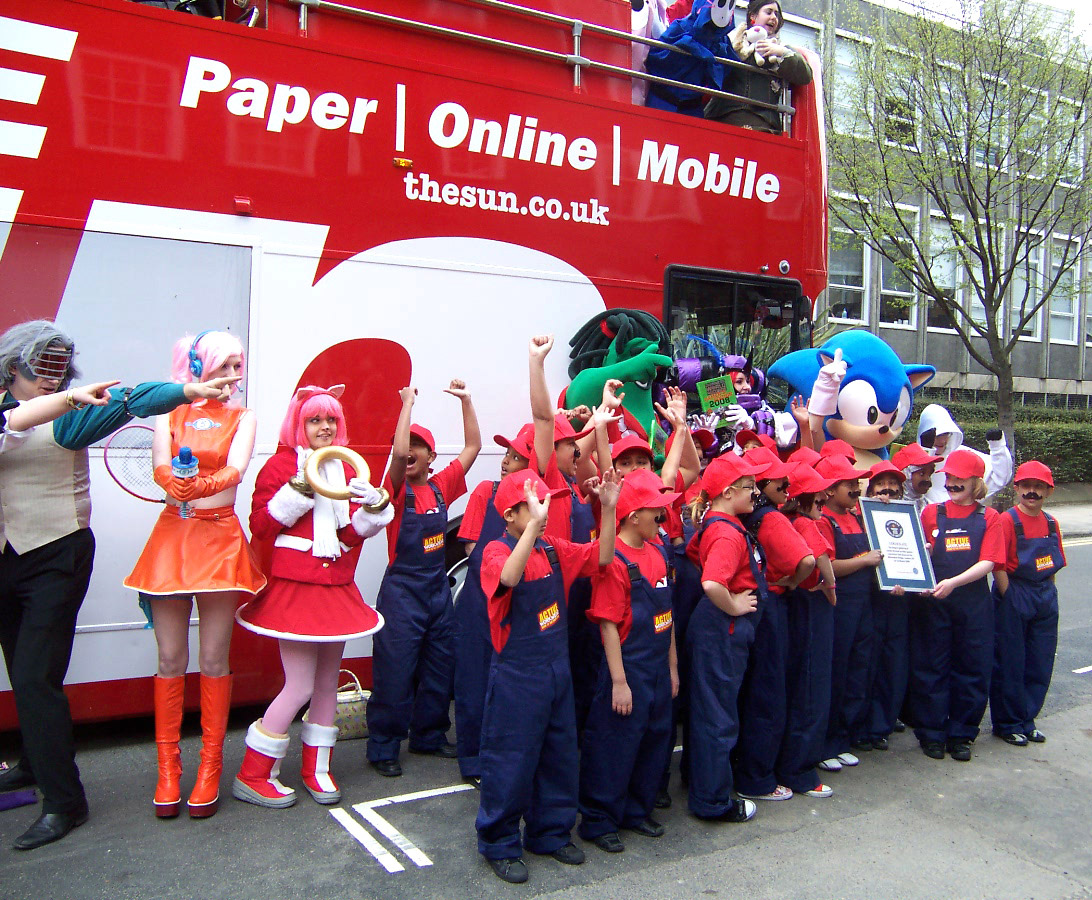
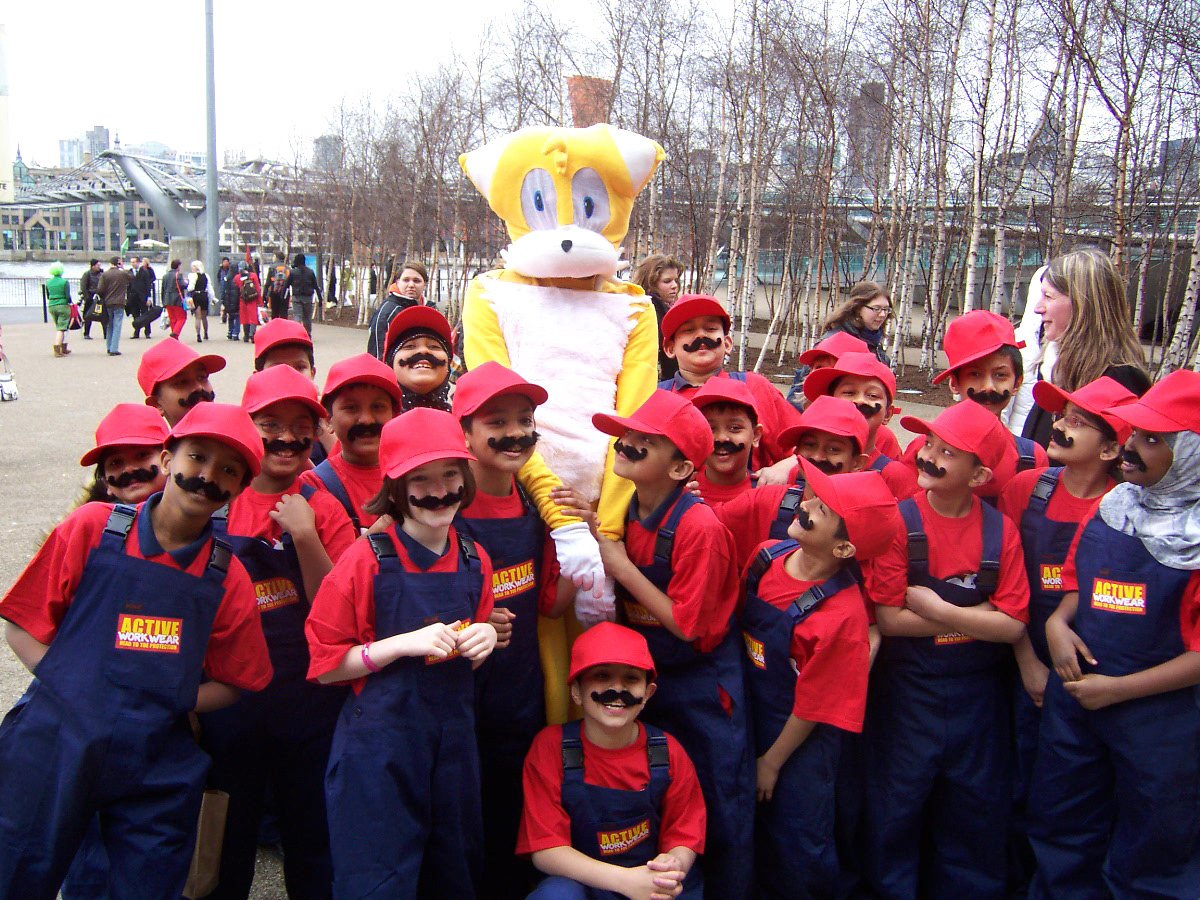
Eventually it turned out the Sun's bus was actually THERE… just parked very far away from the Tate Modern. So after being subjected to a media PIT while being squashed on the millennium bridge i had to guide DiGi through some backstreets to the big red bus. Our costumes meant we couldn't actually FIT on the bus, so we got to stand at the front, which worked out better in the end. Although the very cute (and scary) Mario Army decided to ask Sonic some very personal questions while we were supposed to be posing for the press. One kid even tried to start a fight with him, ahaha.
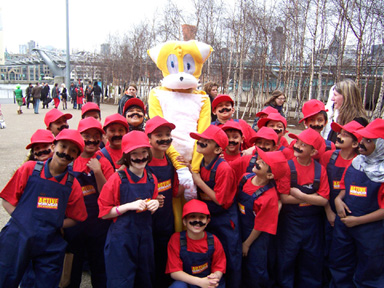
That's a look of FEAR.
Tails however fared a little better. I swear down, Vger was the best Tails EVER. EPIC TAILS. He was completely crazy (all cosplayers should be like him!) From bizarre dance routines to accidentally forgetting to take his Hawaiian shirt off, he was gold. When i look through these photos i still can't stop laughing.
As things wound down after lunchtime people started to head home while we hung around for a little bit longer to get DiGi out of the costume. As soon as the giant head was off he finally got the chance to say hello to Richard and shake his hand. Smiles all around and the promise of breakfast DiGi, Arch, Sonic and I fell into the nearest taxi and returned to SEGA HQ. After packing all our luggage back up we were introduced to the best sandwich shop ever with a mighty selection of cakes. We said our sad goodbyes to Arch' and set off in an ever so emotastic way to catch our plane.
Our journey back to Edinburgh involved missing an airport train to gatwick and getting lost in the underground, so it was all a bit hectic. But seriously, one of the best days of my life. Being able to represent NiGHTS and SEGA to the media and public was fantastic and I'd do it all again at the drop of a hat… most probably not my own hat though as it got a little bit squashed in my suitcase thanks to the BA luggage people. Which i suppose is an excuse to start working on a Journey of Dreams cosplay at some point… hmmm…
24 HOURS OF AWESOME
![]()
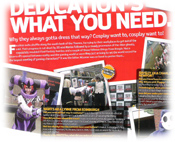
Video and Press links


![]()
Photographs taken on the day (50 total)
 |
 |
 |
 |
 |
 |
 |
 |
 |
 |
 |
 |
 |
 |
 |
 |
 |
 |
 |
 |
 |
 |
 |
 |
 |
 |
 |
 |
 |
 |
 |
 |
 |
 |
 |
 |
 |
 |
 |
 |
 |
 |
 |
 |
 |
 |
 |
 |
 |
 |
Thanks to: MCM Expo forums, Amecon forums, Sonic Stadium, Cosplay.Com, SEGA and everyone who turned up on Tuesday!
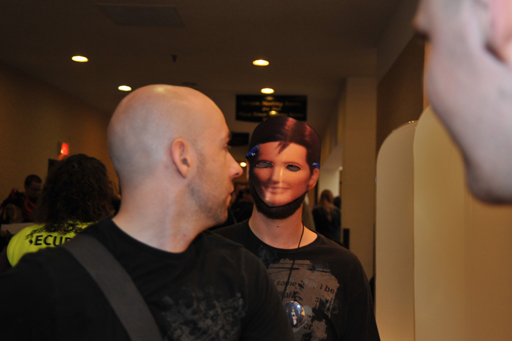
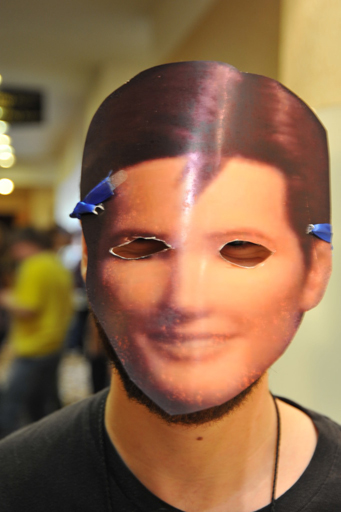
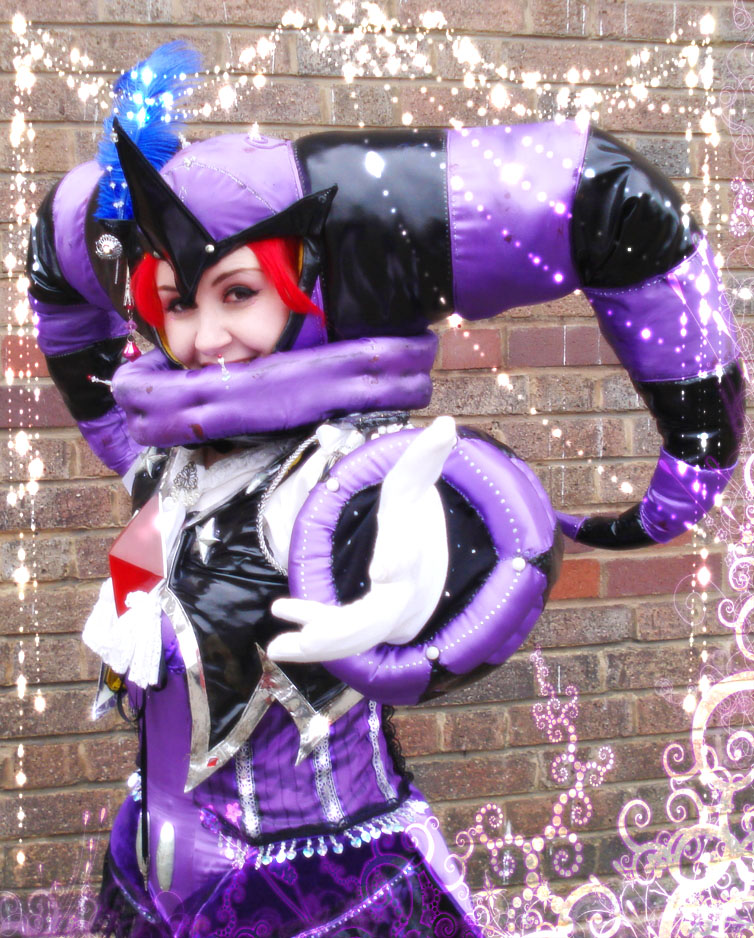
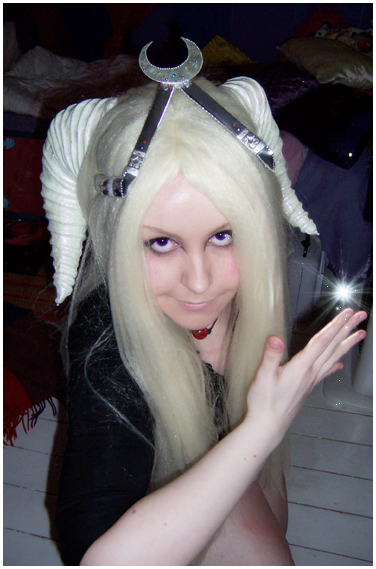
U.V Eye Makeup

I'm only doing ONE eye as i dont want to waste all my stuff for just a test. Also excuse the bad photos, this was from back in the day when i only had a webcam.
0.1. CONTACT LENSES. PUT THEM IN. (Time reduces pink eye).
1. BASE
You start like anything in art with a BASE. Make sure you cleanse your face first of any flaky skin or spots. Then i took white Grimas pro clown makeup and applied it, by DABBING (not dragging) a sponge lightly on my skin. To get an equal purewhite porcelin finish you have to do it in layers. Dry then apply. Until flat white. Then i used a rather gothy white face powder i own to make the paint matt. This also helps it stay in place longer. And a shiny face looks bad. Especialy under lights. So you cover the paint in powder. Then using some blue eyeshadow i dusted over my eyelid socket to give a slight shadow. taking a pale pink powder i started to dust upwards towards my hairline. people used to do this in the 80's a lot i seem to recall, lol. DONT go over your eyebrow line or it looks fugly. And dont go too far down your face either :p
2. EYEBROWS
Now in the final cosplay i will be bleaching my eyebrows platinum blonde to match my wig (and because NiGHTS doesnt actualy HAVE eyebrows, thus pale eyebrows work well) But for the sake of this i used a goldy brown pencil and extended my eyebrows as far as they would go. This is a trick for making your face look sharper and your eyes bigger. Plus if you have big lashes and short brows it looks crap. So you want really stylised brows. Now since i err have jetblack brows i colored them up with gold hair mascara to look lighter XD IT WORKS! Just dont get any in your eyes. Because it burns horribly. So go full Spock and make your eyebrows funky.
3. SHADING and GLITTER !!!1********
Most art has shading. Makeup is no exception. basicaly you stick darker shades the further in your eye you get. In the corners and arches especialy. So i took dark pinks and blues and using a BRUSH i blended to give myself a 'hawk eye' appearence. This means i drag the powder down over my inner eye. Most evil badguy anime charcaters have this kind of appearence, it makes the eyes look sharper and a bit more demented, lol. I do this really obviously with any Reala makeup i do. Remember- MARENS HAVE HUGE EYEBALLS, so you have to make do with humansized piddly small ones and try to big it up as much you can.
NOW. GLITTER. My fave part. I use loose fine glitter. Makeup glitter- NOT crafts glitter. If you stick craft glitter on your face the color will bleed into your sweat, run down your face, stab you in the eyeballs and possibly blind you. So no doing that. I use glitter in little pots i bought from Accesorise years ago for like £1 each. I have a lot of different colors for different effects. The multi white stuff is best because it looks like fairy dust! And you can shove it on everything including your hair and its so damn sparkly. But yeah. THE SECRET TO STICK ON GLITTER GOOD= LIPGLOSS. Use a lipgloss stick and shove it on your face where you want the glitter to stay, and it will STAY. Like making sand pictures as a kid. Blow the excess off. I used dark pink glitter here.
4. MORE GLITTER.
You can never have enough sparkle XD So i take the OMGWHITESTUFF and cover my entire upper eye with it. Then i use dark violet glitter and do the shading in thing. Blend it cuz nothing looks worse than solid big dods of makeup >_< Lots of lipgloss later i have a very glittery eye. And i am happy.
5. EYELINER FUN.
Never ever use a black pencil for doing sharp lines around your top eyes because it smudges horribly and melts. I always use liquid eyeliner. Use the kind with the BRUSH not the felttip thingy. Mines is like an actual paintbrush (which is pretty useful) XD
Now U.V NiGHTS is very birdy based as you may have noticed. So i try to give his eyes a sort of 'swallow tail' look. Big ol' anime eyes are best done with liquid eyeliner because it looks like ink. It takes a steady hand and a lot of practise to NOT BLINK or SNEEZE. But paint it on like you would on paper. I always draw false lashes to make my eyes look bigger. Its something i was always told to do when preforming on stage. Actor makeup is always overdone to show up your features under bright lights so you need to have your eyes outlined properly. Or you will bleach and look kinda faded with tiny eyes. Be careful when underlining your bottoms. The tiny little lashes tend to catch the brush and spray everywhere. It takes practise like anything.
6. GIANT EYES OMG!
The secret to big exagerated eyes is drawing your liner bigger than your eye. You'll notice i made the inner eye come down to a point. Well thats because i then get a tiny brush, with white facepaint and paint in the corner of my eye to hide the pink skin bit. It stings but it makes your eyes look wider by about a CM. And thats a good thing. *points to corner* see? Its white now. And from a distance that pink bit wont show up at all.
7. A USE FOR EYE PENCILS.
The only thing i find pencil liner good for is smudging a smokey undereye effect. So i done it here. Blend it like you'd blend pencil on paper. Dont use a sharp pencil, melt it a bit.
THEN WHEE. GLITTER STAR. I used lipgloss and glitter again. I applied it with a small brush ![]()
8. MASCARA AND LASHES.
The best bit is the mascara because it instantly makes you eye cleaner and bigger. Its like inking in an artwork to tidy it up. Always do both sides of your lashes and be sure to brush them UPWARDS to open the eye.
Then the BEST EYELASHES EVER. Feather lashes. Now ANNOYINGLY while i was doing this i realised i couldnt find my eyelash glue ;_; so i had to kinda just shove them on without ANY adhesive at all and hope they stayed for the screenshots.
When you DO have glue, make sure you dont get it in your eye. Glue eyeball= not fun. But yeah, there's my eyelashes all done.
CONTACT LENSES ARE NOT FUN SO PUT THEM IN BEFORE STEP 1.
And remember to follow the safety instructions on the packet. Do not – do NOT overwear your lenses. If they have been worn out throw them in the bin. They lose the ability to stick to your eye and can give you a horrible infection and even cause you to go blind if misused! So don't take any stupid risks. (Especialy not for cosplay!)
So taaadahhr. Thats a piece of NiGHTS face art for you there. Hope this was helpful for whatever reason.
Tutorial © of TRiPPY.
[ BACK TO MAIN ]
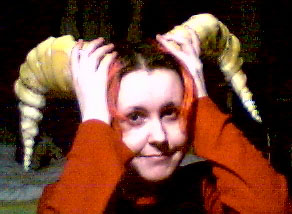
How to make a Maren Hair/Horns combo… meal.
|
Nobody really knows what a Maren keeps under it's hat, if it indeed IS a hat, lol, we all like to argue. For those of you who want some pointy ram type horns here's a tutorial to show you how easy it is to make some. They can be used for cosplay, for Halloween and for Ren stuff. They can be made in all shapes and sizes, don't just go copying the examples i make, try experimenting. These horns are made from papier mache, not clay. Clay in small amounts can be seriously heavy and isn't the best material for head ornaments. It's possible to make 2 molds and cast them in resin or fiberglass but this is the cheap, simple and chipper way. Plus i suck at sculpture. These horns are recommended for use under a wig, not actually UNDER a hat because of the fact the weight wouldn't work (Unless your skull likes staples). These are still kinda heavy, and to be honest I'll be looking to create a new method soon. List of things you'll most probably need: -Lots of old black and white newspapers (color bleeds into white paint) Okay that's all the junk i remember using. As i'm talking through how to make these i'll suggest other alternative materials too. You'd be amazed at how old things in a trash heap can be turned into something pretty awesome with enough glue and sparkles! Things you should aim for when making horns-
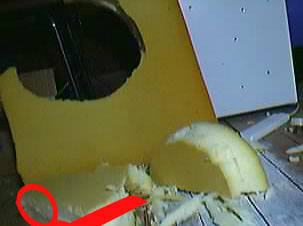
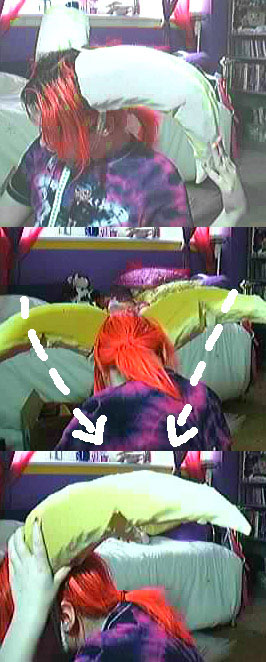
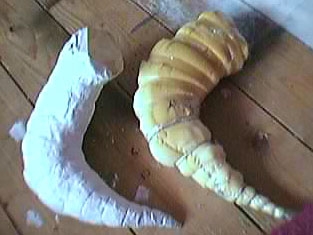
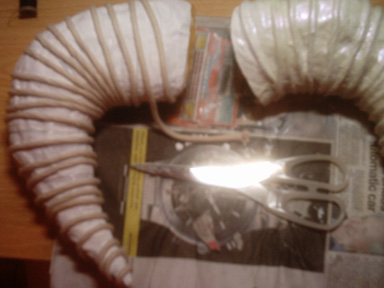
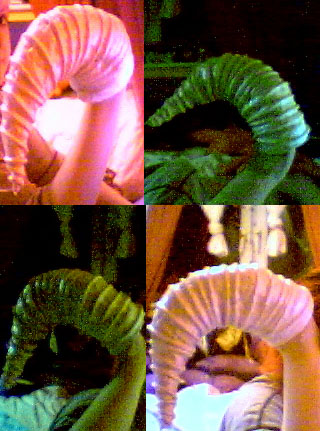
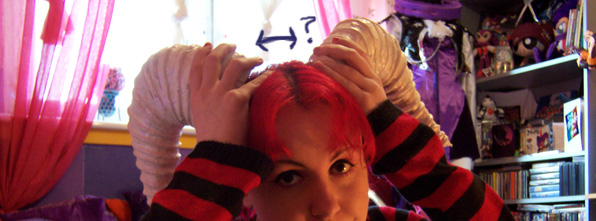
Step One- I HATE FOAM. Foam is like the bane of my existence. It's impossible to sweep up, you find it sticking to your head 3 weeks later and it makes you sneeze a lot. So first before you begin, clear your workspace, use a FLOOR because it will get messy, do NOT use a carpet. Put down a sheet of newspaper or something. There! Okay the non fun part. Take your big bit of foam that should look like this stuff HERE—> Then take a felt tip pen or an old eyeliner pencil or something and draw a BIG curved 'L' shaped horn on it. Think of the shape of NiGHTS or Reala's head (Jackle is harder) and try to put it onto the foam. Then you want to take the stanley knife and cut right through the foam as straight as possible until you end up with a big ugly looking foam thing that bears striking resemblance to a moldy banana! Flip it over so it's on it's opposite mirror image side and use it as a template to trace your other horn onto the foam with your pen. It's important that you flip it over or you'll end up with two left horns instead of symmetrical ones. At this point you'll have these two big huge misshaped flat bits of foam and you'll hate your progress. I did too. Feel loved i hate YOUR progress. Anyway! Take your two oversized foam boomerangs and using these photos as something of a bad guide cut the squareness away from the sides of the horns using the big scissors (or carve it with the stanley knife) It's sort of like peeling an apple or sharpening a stick. But be careful with the blade. You don't want to trim TOO much of the foam off or you'll end up with skinny rubbish horns that will just snap in half. Voila! You'll see there that i've smoothed/carved off all those nasty flat square edges and now the foam is slightly rounded. You'll also see that i've cut out two big triangle wedges about half way along the underside of the horns. This is so they don't stick straight out (like picture two) and so you can be crafty and make them curve inwards/outwards/wherever like proper Maren ones (like the arrows indicate). Push them in two and you'll see they curve better now. Your aim is to take the needle and thread and stitch the big triangle gap closed so they STAY in a bent over curved horn position. Use a LOT of thread and don't be afraid to make a mess, as long as the stitches hold. I think that's the hardest part because the thread will keep tearing through the foam, but persevere and eventually you'll have sewn the floppy bits tightly down against the rest of the foam. It should now look something like THIS—>
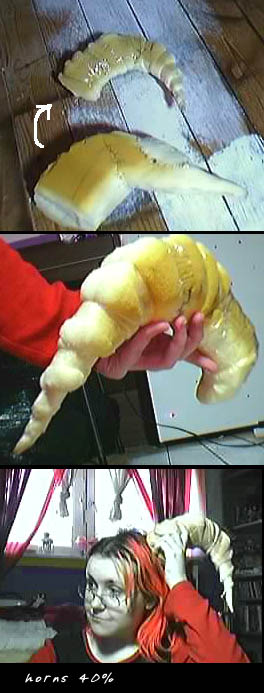
Now, Pastry horns may be okay for bad Reala jokes but we want shiny, rustic, bricky, shelly, CONCRETE HORNS YEAH. We want horns that will take out the eyes of our younger shorter siblings when we turn around at a Con too fast. We want horns that will get us jammed in doorways and leave us in embarrassing headlocks with fellow Maren cosplayers! So onto the next step! Actually, no, before the first step let me explain something i keep being asked a lot. The reason U.V's horns are a different shape from his hat is because the last angle in his hat is just full of his hair winded around. DON'T QUESTION THINGS THAT DON'T MAKE SENSE Step Two- TIME TO MAKE A MESS
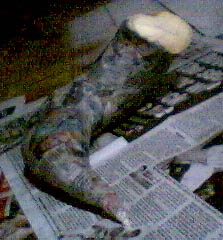
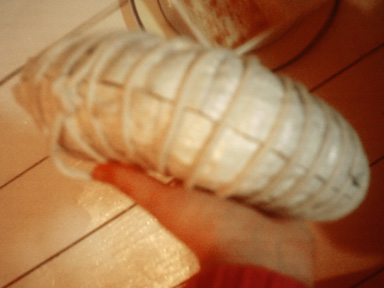
Grab your big bowl, your packet of flour and about half a cup of water. Mix the flour and water together until you have a thick non lumpy watery paste, thick but not dough. Then add in some PVA glue (or marvin medium) and mix it thoroughly. I also added some fizzy lemonade… i know that sounds weird but apparently sugar makes the paste stronger. SO you have this bowl full of gunk. Put a lot of newspapers on the floor and rip the rest of them into short strips. Then slowly, and carefully, dunk the strips into the mixture and wind them around the horns. Repeat this until the entire horn is covered. Repeat until you start to lose your mind, which should take about 2-3 hours of constant layering. You want THICK papier mache. Not thin breakable horns because eventually the foam is going to not be there and the shell that's left has to be hard wearing. I really hate doing papier mache stuff because it takes an age to clean up afterwards. Waaaaaaaaait you think as you notice that your bumps you made with the sellotape winding seem to be for naught and the thick layers of paper cover them entirely! Never fear they do have a purpose.
So you have your two paper covered horns, they look ugly and smell like cookies. But don't eat them. Let them dry for a few days. OR! Be an impatient fool like me and blast them with a hairdryer for a few hours then leave them for one day. What may look dry on top will still be soggy underneath. Remember that foam absorbs like a big sponge so your molds will retain moisture for a long time. Best to leave them for a few days and forget about them while concentrating on another part of your costume or learning how to tap dance or something. When you return in a few days you feel a small shred of pride that you past the hardest part of making NiGHTS horns and the rest is plain sailing. You cosplay nerd you.
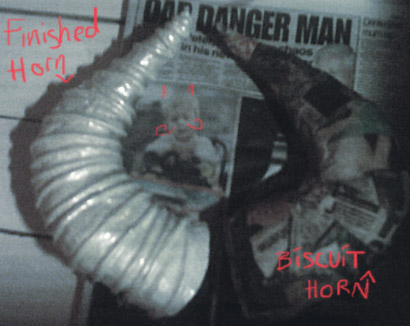
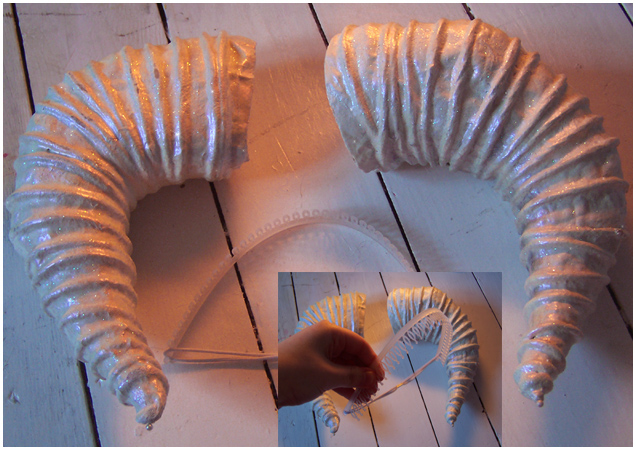
Now because i'm lazy, i only done one horn and only just started making the other one last night, i kept putting it off. So just pretend that in the following photos i have TWO identical horns. Yeah. Also can i just say it's nigh impossible to have two perfectly matching horn shapes, so don't get too frustrated mines are a bit wonky too. Remember my Art motto- GLITTER CAN MAKE CRAP LOOK GOOD. People get blinded by sparkly and ignore the shortcomings. SO as long as you have 2 horns that look somewhat similar, you're fine, honest. Just try to make them the SAME SIZE/SCALE/LENGTH. Wonky curves are fine. So you have your newspaper horns. Get your needle and thread again and wind VERY TIGHTLY like you done with the sellotape down each horn, giving you back your horn bumps. Stitch it at the end so the coils don't just unravel. THEN you get your floor varnish and thickly coat the horns making sure the varnish gets in all the thread grooves (it makes the thread stick). Speed dry it with the hair dryer or leave it for about 40minutes until completely dry. Don't let them get too hot (fire is bad m'kay) and have good ventilation (fumes are BAD for you). Then when the varnish is dry give your horns a base coat of gloss paint in the color you want it. I chose white because U.V's horns are, well, white. So yeah. The painting here doesn't have to be perfect, it just has to give the paper more strength. Leave it to dry. Then repeat the windy thread tactic AGAIN over the groves you made the first time. So it looks like this.
Step 3- Tactful Tissues. Right now you're going to make even more of a mess. You're going to cover all your hard work in tissue paper (the stuff from the bathroom). Use the PVA glue and layer mushy tissue onto the bits of your horn that you think need more definition. Then when you have all the major lumpy bits done finish it all off with another thin layer and completely cover it in PVA glue (use an old paintbrush). It will dry shiny thus adding to the overall hard as nails texture. Cover them in another layer of paint for good measure. Just make sure your thread ridges are still visible. They serve a purpose! Step 4- Make or break time. The part i dreaded. The bit where all your hard work can go completely wrong. Now originally i had decided to just leave them, shove some glitter on and leave them at that, but Blu moaned at me saying the twisty swirl lines going around the horns weren't deep/defined enough. So my horns looked like this. Just kinda subtle ridges—>
Ideally i wanted them to look like Kichi's 3D model horns. Like this.
So it was back to the drawing board, or rather, washing line. Now there was no way in hell i could ever copy the complex multi swirl Kichi done so instead i opted for the next best thing, a continuous single spiral. I asked my mum for her old washing rope. But still there was the PROBLEM of them being way too heavy because the foam had absorbed so much mixture of glue and varnish. The only way they'd be lighter is if i somehow got the foam base OUT and left them hollow. I didn't know if this would work or not, but it does, or at least mines did. I was worried the shell wouldn't be strong enough or would cave in when cutting it up. Hard scary part!- Be very very CAREFUL. Draw a thin line down the underside and top of your horns. You're going to cut them in HALF! So draw from base to horn tip (not across the way). Then taking the stanley knife slice away at the line until you reach the very end. Pull the shell apart and remove the foam. The foam will be stuck in parts with glue or whatever but just snip it with the scissors. So eventually you have two halves of one horn. Cut your washing rope in half, first make sure it's long enough for the amount of spirals you need. Place the two halves closely back together again (throw the foam into the trash). Then insert one end of the rope into the very tip end, bend it back and start to tightly spiral the washing cord back along the hollow shell, letting the thread ridges guide the rope. Use them as tracks. The rope should be tight enough and secure enough so that it doesn't unravel. When you get to the opposite end of the horn you need to tie it once then bend the remainder of the rope into the mouth of the horn and tape it down. You'll find that the rope alone actually holds the cast together. But it looks dumb with a great big line down it so out comes the magical tissue paper again!
Cover the rope and the join line, infact the entire horn, all over again, with generous layers of tissue paper and glue. Use a little tub of water and a paintbrush to make the glue easier to work with, so you get in between all the ridges. You want the rope to look smoothly joined to the horn surface, not like a rope wound around a cylinder. The tissue paper will be what will keep your horn together securely and hide all the flaws on it. To give you an idea of how much tissue i used to cover the rope i went through half a roll. Don't roll it on though! Paste it on in squares using a brush.
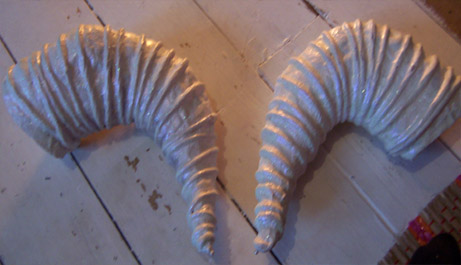
When it's all dry you'll be left with the perfect horn shape to paint and decorate! Step 5- Finishing up.
Give it a final coat of paint, making sure to cover any discoloration and make it look smooth. Then re varnish. It may seem like a lot of layering, but it's all that paint that makes it sturdy and holds the thing together. And yeah (AS USUAL) one of my horns turned out really heavy compared to the other, i must have some kinda symmetry dysfunction >_> At this point you can do the following things while the varnish is still tacky and semi dry-
Whoever thought the above could come from an old sofa, heeehe. The last things i did to complete my creations was i used some old dark blue/black eye shadow and dusted it in between the rope gaps to add to the shading. I also filled the horns with some pillow stuffing to neaten them up. NOW! I shall devise a contraption to hold this entire thing on my head under my wig without falling backwards. I have a few plans already but when i find something that works i shall write up a tutorial on how to do it. This is going to involve a lot of metal hair bands and wire. . . I hope this helped give you a better idea of how i make my horns ^^ It's not that complicated. You just need a lot of patience and a good sense of balance. -UPDATE- Ok now that's all very well, but how the heck do i get these honkin great big ol things to stay on my skull?
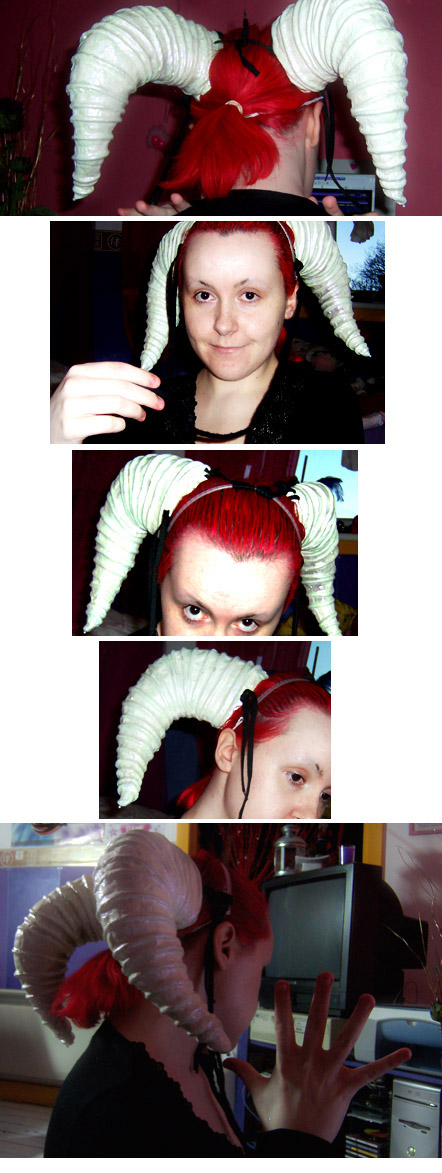
So i tried wire. Don't try wire. Trust me on that one. I nearly gave myself a DiY lobotomy. Then i tried stitching the horns to a skullcap… thing, which was nigh on impossible due to the thickness of the horns. Then i went HAIRBAND HUNTING and blessed be, Claries Accessories merchandises small miracles (they were lacking miracles the last time i was employed by them >_>; ) If you go to the neglected section up the back of most stores that sells the boring weird hair bun holders, non working ponytail devices and pointless centerparting zigzag stencils (oh god) You'll find one of THESE wonderful things that you'd never buy at any other time in your life BUT for NiGHTS cosplay. Honest.
Then you take your 4 shoelaces, stab holes in the tops and sides of the horn bases and tie them to the plastic part of the hairband. I won't lie, it's not the best setup in the world and the weight hurts your scalp. Backcomb and hairspray your fringe so the comb slides through less (you don't want them to slide backwards). Then you end up with magical 'hah TRiP defied gravity' funhouse horns! It's IMPORTANT that you wear your hair back in a ponytail as that's what gives the hairband extra support.
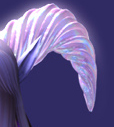
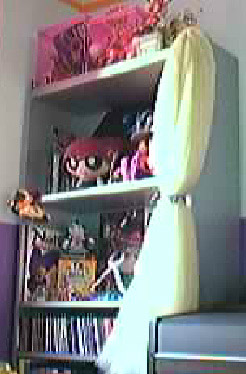
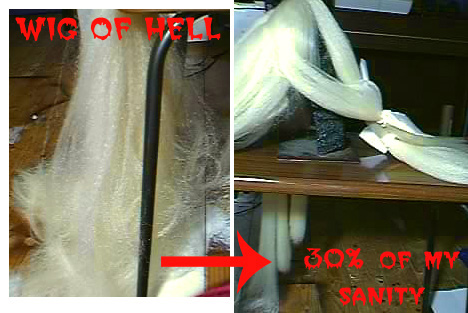
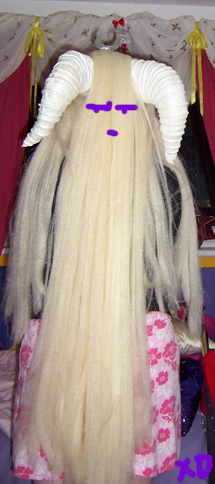
Now you figured out that part. Now is the part where you mess with the hideous world of BIG HAIR. HAiRSPRAY Buy your wig. Buy the most expensive wig you can afford, otherwise you'll end up with a £15 godiva wig that's made out of crimped plastic, looks like hamster bedding and hangs like a fat pair of curtains.
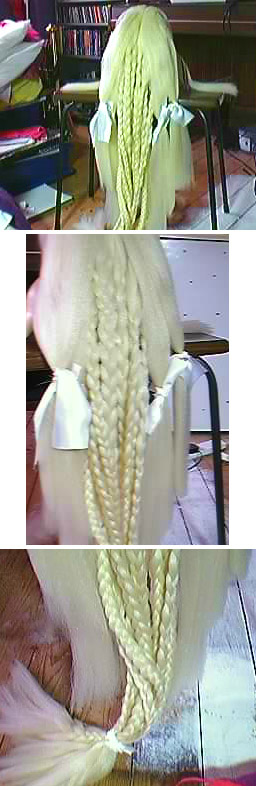
People pay up to £200 for a decent cosplay wig, i would have too if i'd known how rubbish this wig would be. But even though i was horribly disappointed i decided to try salvage it and turn it into something pretty and sparkly. Take heed! Sometimes you can make bad into good. Now i don't have any hairdressing experience or skills other than cutting and dying my own hair since i was a kid, but it's simple enough to give a wig a good trim in sections, thin it down and cut it into layers. You'll need a wig head, or a… whatever to put the wig on, or get some poor sibling to wear it while you work on it. Don't cut off their ears. That would be bad. I used a statue Blu gave me. Shh. Separate the entire wig into long sections, lots of them, and tie them with fabric/ribbons to stop them being mixed up. Using hair-elastics on a wig will make it messy and tuggy. Tie it instead. Get a non plastic comb (plastic causes static and frizzies) and work from the bottom to the top. Use the end of the comb to unravel knots instead of yanking away and tearing chunks out of the wig. It helps if you use hair oil or frizz gel or something slightly greasy on your hands. The wig wont absorb it like real hair would (plastic isn't hair), but it makes it easier to work with. And on the theme of PLASTIC ISNT HAIR. Pay attention. Don't use heated hair appliances on plastic wigs. It will melt, clump, go on fire and waste your entire project. Plastic styles with hairspray and wrapping hair tightly in curlers for a few weeks with hairspray. Don't treat it like real hair. It's barbie hair. All you need is a lot of patience and a lot of hairspray. Speaking of patience.
Even the most hopeless wig can be turned into a thing of beauty.
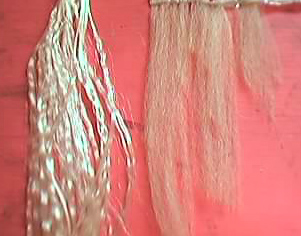
Tips on choosing a wig to work with would be, the cheaper it is the worse it is. A godiva length wig shouldn't be under £50 if its good quality. (afterall more hair= more money). If buying on Ebay only buy wigs that have closeup photos, you should be able to see the hairstrands defined and slightly glossy. If the hair all blends into one big straight cut blob you know its a bad buy. Here's an example of wig fibres.
The unrealistic frizz on the right is my wig. The hair on the left is high quality hair. You can also buy human hair wigs and extensions but the price for human hair is madcrazy and you can end up paying over £300 for a full wig. Extensions range from £20 upwards. Make sure you shop around and know the bad from the good, otherwise you'll be wasting money. If you have long hair and your wig is short or medium length, wear a wigcap! And always gel down your hair under the wig. Don't be afraid to attack it with long hairpins in order for it to stay on your head. Now getting back to the horns you need to do something crazy and possibly hazardous to your beloved wig. You need to slice two holes in the back of the scullcap and then push the horns through, leaving the hairband contraption on the other side. Putting all this onto your head requires a LOT of effort, patience and some mild discomfort, but then you get exactly what you want-
I hope that sheds some light on the wig thing. Just use LOTS of hairspray. And if you're having problems styling a wig then be sure to visit Cosplay.Com's forums for advice. |


Tutorial © of TRiPPY.
[ BACK TO MAIN ]

Tips and Advice 101!
Things you should already know before cosplaying or making a costume. For more detailed written work see the tutorials section.
-Costume Planning Tips-
1. Always know your limits. Although it's fun to take on an ambitious project with a thousand shiny glittery things you have to know you have the motivation and skill to complete it, otherwise it's a big waste of materials and probably money. If you look at a costume and have no idea how to physically create a large part of it then just DON'T until you have some idea of how you'll tackle it. Get a sketchpad and scribble down every little pattern idea you have. If you're new to cosplay there is no WAY you are going to create a full costume in under a month, let alone 5 months.
2. Paper before fabric. Never start making a costume with no basic pattern in your head or on paper. You'll probably find that your pattern/design will change as time goes on, so make sure you get a final plan on draft paper before chopping up any fabric whatsoever.
3. Plan your budget. No point starting a costume with no way to buy the proper materials or obtain them. I recommend buying fabrics from Ebay because if you shop for fabrics in your area you tend to settle for second best on what the shop stocks rather on what it is you EXACTLY set out for. Get a bit of paper and research costs before even starting making whatever you're making. You don't want a half complete costume- especially if it's for a convention deadline.
4. It's normally not the done thing to cosplay as somebody's fan character without their permission first. So use the magical words. And remember to give them photos afterwards.
5. It's possible to create a NiGHTS cosplay without spending any money whatsoever if you're resourceful and not fussy on materials. When starting a project you have to ask yourself if you want to make this a maximum full effort dealie or just the one off costume for fun. If you want it to be PERFECT then be prepared to spend at least $100 on materials alone, unless of course you're very lucky and own a fabric shop. If you're wanting to make a costume to wow people then DO NOT SKIMP ON EFFORT- TIME- OR CASH. You'll thank me later.
6. Time planning. I started my U.V costume nearly 2 years before the con, it may seem like a lot of time but trust me it flies by and to this DAY it's still incomplete. I didn't flat out work on it constantly so give yourself a LOT of lazytime. If you have like a month to make a costume make it a super simple costume otherwise you'll run out of time, have 0.3th of a costume and feel annoyed at the con.
7. Look at other examples. RESEARCH ONLINE. That's what the internet is for, learning (and porn). So make good use of it and read up on other famous cosplayers, other series you're interested in that have cosplayers (I recommend Amano Final Fantasy for detail), stare at a lot of photos and read up on cosplayer message boards for tips and problem solving. Also don't be afraid to ask the Pro's for any advice because i found that people will ALWAYS offer a hand or 3. Don't ever get offended if somebody wont reply though, a lot of these guys online have to travel to competitions abroad, have workshops and actually make a living from cosplay, so they're very busy people- remain courteous.
8. Decide if you're going to make the costume yourself or commission it from somebody else. Remember though conventions have rules about entering somebody else's work. Be honest about your creations and give proper credit where due. If you're commissioning it be sure to give the craftsperson a LOT of references and give them leeway for a little artistic licence. The best kind of deal is pay half up front for materials and then pay the other half on completion, that way neither person gets completely ripped off if something goes bad halfway through. Remember that costumes are a lot of hard and blister inducing work!
9. Make sure you buy more material than you need. You may think that the 2.1 yards of spangly spandex is more than enough, but you will -always- run out. Nothing is worse than having a certain shade of fabric and no matching fabric to patch it together with. Remember you have a hem allowance to cater for too. That's about an inch all round for alterations sake.
10. Don't cosplay as a character you know will look dumb being cosplayed unless you really know you can pull it off half decent. Since the majority of non cosplayers like nothing more to laugh at a bad cosplayer be prepared for bitching unless you are willing to put in a real effort. The two most important things in cosplay are GOOD CRAFTSMANSHIP and EFFORT TO GET IN CHARACTER (for photo posing especialy!). So think first before making a costume- 'Could i make a convincing version of *insert name here*?' No point in making a costume so outrageous you're afraid to step out of your own bedroom, let alone onto a stage.
-Construction-
1. Have a big(ish) flat workspace for cutting fabrics, spray painting, hammering stuff and probably throwing glue everywhere. I don't recommend a bedroom carpet. Fluff + paint- BAD IDEA. And your parents will murder you. Be sensible and use a big sheet of wood, bin bags or paper or something. Ideally use something like a garage floor for weapon/accessory construction. It's very messy. I had to repaint my entire bedroom floor. You -NEED- a large flat area for pattern cutting. Lumpy wrinkly fabric guidelines are a no no.
2. Take good care of your tools. That means oiling and cleaning machines, keeping scissors sharp, not using blunt needles, keeping your work area neat and tidy (stepping on pins isn't fun let me tell you), keeping all your fabrics folded in storage boxes when not in use and putting loose threads into the trash and NOT back into your sewing kit. Keep Glues, resins and other chemically dangerous stuff in safe places out of the reach of young children and pets. Regularly check any electrical equipment you use is in good working order and not a fire hazard. Don't have lots of wires running across your floor, or you'll trip up and a very heavy sewing machine will land on your toes.
3. Keep any patterns and fabric swatches/mockups in labeled big envelopes. I keep mines for reuse in my filing cabinet so i can find them easier later on. It's also a great idea to collect clothing patterns in general so you can adapt them for future projects. That hideous 80's jumpsuit pattern at the back of your mums wardrobe may be turned into the best Reala costume ever. It's also a good idea to collect pictures of clothing that inspires you, do your homework and keep it safe.
4. When using a sewing machine NEVER forcefeed thick hemlines through it. Do it by hand if you must (using the dial) If you use the foot peddle the material will jam and the needle will snap and go flying into your eyeballs. Honest. I broke 2 needles. Luckily i was wearing my specs. Remember you're sewing, not driving a racing car. Keep your fingers well away from the needle.
5. For perfect corners with a machine, take the line up to about a centimeter away from the edge of the fabric, stop sewing, lift the foot- with the needle still DOWN, rotate the material, put the foot back down and continue in your new direction. That way you don't get loose stitching.
6. One of the unspoken rules of cosplay is to never use shiny thin fabrics like satin, silk, spandex and lycra on large area's of your costume unless your costume requires it drastically. It's not flattering on ANYONE- unless you use it correctly and put the proper kind of hemlines in it. The thing to remember about this kind of material is that yes, it's gorgeous, but, the instant you're under strong lighting or camera flash it shows up every little line in scary detail. So to avoid VPL and that charming friend cellulite wear something underneath your costume that gives you the proper support you need, keeps you warm, doesn't make you sweat and ruin your costume and that isn't lumpy. Look at the clothing the character is wearing and think what texture the fabric is. Annoyingly i'd say most of the NiD fabrics ARE satins, PVC's and lyrcas ahahah, we lose. Circus/ice skating/dance wear shops are your best bet for NiGHTSy equipment that looks realistic.
7. Use strong thread. If you're sewing and it keeps fraying or snapping then do NOT use it on large items such as the butt of your trousers, otherwise the minute you sit down they'll split and you'll have a red face. Remember to always reverse stitch the end of sewing lines to secure it from undoing and to not sew TOO close to the edge of the fabric. Thin materials will rip and all your stitching will be worth didly. 2cm's is enough.
8. Using superglue is dangerous so only use it when you REALLY have to. Know that it makes some fabrics ignite spontaneously and gives of dangerous chemical smoke stuff. I found that one out the hard way. Use fabric glue. Otherwise your costume will go up in flames.
9. You -need- rulers and tape measures. Guesswork is fine but you want a symmetrical costume. Lopsided looks bad. Draw around cake tins for circles, trace existing items of clothing, improvise!
10. I draw my fabric plans with chalk (dark material) white colored pencils and normal pencil for light fabrics. Always draw on the REVERSE side of the material (that means the side that nobody will see). Ugly is being able to see markup lines. Don't use anything like ink that the fabric may absorb (and ruin). A perfectly smooth flat surface is essential for drawing on your material.
11. Make a test version first from crappy old material. You'll find that your 'foolproof' costume you just made will be COMPLETELY ANNOYING the second you try to put it on (if you can get it on at all). So save yourself the grief and make a dummy version that you can draw all over, pick out the stitching from and then trace onto the real material. I use stuff like old curtains and bed sheets. Then when I'm done with them, off into the filing cabinet they go. Never throw out something you can re-use later. Recycle!
12. Line your fabrics. By that i mean if the material is thin then make sure it has identically shaped backing material sewn on the other side. Not only does it make the material less fly-away and crap, it also makes it way more flattering to wear. Plus longer life and no horror story if the material tears. It's a good idea to put backing fabric (like heavy cotton or something) on materials like PVC which tend to curl up because of the elastic in the weave. You want your fabric (unless it's a big girly frilly dress) to be realistic and hang properly. Which means heavy. I think material weight is what makes a good costume stand out from a bad costume. Light costumes tend to ride up, crease badly, twist, and not sit right. Closefit costumes still benefit from lining of some sort.
13. Before sewing panels of material together remember one simple fact- IRONS ARE YOUR FRIEND. There's nothing more annoying than a con full of crushed people. So iron your costume while constructing it to avoid creases you cant fix later when it's all sewn together. Be careful when using an iron however and be aware that sequins, some elastics, PVC and fabric paints all melt and stick to the iron, then usually go on fire pretty quickly. Safety first kiddies! You'll find that material becomes a million times easier on the sewing machine after it's been ironed for some reason. So iron iron iron.
14. Can't find that perfect wig in that perfect color? Then do the obvious thing and dye it. But not just any old way. Dying wigs is a tricky business and hair dyes won't work on synthetic hair. So visit the tutorials section for a step by step guide on how to make and use wig dye, plus styling your wig. It's cheaper than you think.
15. Always use a good sharp long pair of fabric scissors. Not only is it easier to cut straight lines perfectly but they glide through the fabric instead of having to hack away and get frayed edges. There's nothing worse than a pair of dull paper scissors on material. You can even buy special crafts scissors with jaggy edges that make patterns as you cut, which look great for sleeves and decorative trim.
16. You can never own enough clear nail varnish, ribbon and pins. Nail varnish stops threads unraveling and can be used as a varnish, ribbon hides bad edging and gives lines more texture, pins seem to always vanish one by one as the day goes on. Have lots. Toothpicks are also pretty useful for fixing paint detail gone crazy.
17. Before making any type of NiGHTS hat its always a good idea to have something head shaped to put it on, otherwise it's twice as hard to create. I used an old heavy paint tin full of sand, on top of a high chair- so the horns don't get all mangled every time i put it down. Hats are big and tend to get in the way so know where you are going to work on the thing before making one.
18. Before putting a costume on to try/test it out for size -check it TWICE for stray pins you may have left in the fabric at dangerous angles. I put my hat on with a pin sticking straight out that i'd actually sewn into the lining by complete accident, it ended up giving me a very nasty cut on my scalp, so seriously, always check. I don't want anyone losing any eyes or whatever.
19. When handing wire or old coat hangers use proper WIRE CUTTERS. If you use a hacksaw you will completely dull the blade and get a very ragged edge. Also remember to put masking or duct/stage tape on each end of the cut wire to stop injury. I got scratched the most by sculpture wire. Always be aware of where the other end is. It tends to spring about.
20. If you're using high VOC paint, spray paint or resin then do it OUTDOORS or with all your windows open. Because i have no garden (or face mask) i had to spend a few nights sleeping in my hall because my bedroom was so full of spray paint fumes and gloss fumes. If you have any pet birds or small animals keep them OUT of your area until the fumes are gone.
21. When making clay molds for latex or other materials always coat your mold with regular PVA glue (to seal it). This stops the liquid absorbing into the clay and gives it a smooth non lumpy finish when taken out.
-Conventions and common sense-
1. Since fans WILL be fans and often go a bit over the top glomping their favourite character cosplay for photos at Cons, take some BACKUP with you. A big brother, a big sister, your big err.. mother. You get the idea. Never travel to a Con or Expo alone unless you feel 100% safe and able to tackle any pervy fans (or people on the way there) who forget you're just a cosplayer. (A lot of people who don't do cosplay see it as being an adult thing so BEWARE) If you're a girl wearing a skimpy revealing outfit then take a long coat or make a cloak to cover up with while you're not intentionally wanting attention. Plus it could get cold. Having a homegrown bodyguard will also usually boost your confidence with your costume, so make sure you feel safe. If you find yourself cornered or having any unwanted persistent attention then tell the person politely to back off, if they keep at it then find the nearest Con attendant and tell them. Usually hanging around other large groups of people will ward off weirdo's. Sometimes male cosplayers will go out of their way to assist overcrowded girls and vise versa. If you see someone being harassed lend a hand and get them out of any shifty situations, pretending you know each other for example. Keep your wits about you and act sensibly.
2. It's a great idea to carry a small bag or concealed pocket on your costume that contains the following items:
A card with your details on including phone number,
A few bandaids,
A small emergency sewing kit (thread, needle, glue, spare button),
A hairbrush or comb with a little mirror,
Spare change.
Lack of pockets on a costume will only become apparent in annoyance when you get to the con and realize you have nowhere to put your car/hotel keys, money for snacks and no thread to patch a big tear on your costume. Be prepared! You want to look your best, especially if you're entering any competitions. Never stitch pockets into tight fitting areas though as it looks hideous. HIP LUMPS. Go for baggy areas. I have concealed pockets in my waistcoat, yet from the exterior you can't see a thing. It's useful.
3. No real weapons! I can't stress that enough, especially in today's society. Even something that LOOKS like a real gun for example should be clearly marked with the orange cap (this is called 'peacebonding') and stored away SAFELY until in the convention building. You need to also point out to airport staff when scanning your luggage as it being a fake costume prop, otherwise you could find yourself in a bit of a dangerous drama. Check the convention rules about weapons before taking one. That goes from everything from guns to swords to fairy wands. Everywhere has safety regulations to defend themselves from potential lawsuits. Your neighborhood police wont want you running amok with a buster sword scaring old ladies i can assure you. What you may recognize as just being an anime prop weapon could be seen by somebody else in the community as a real threat. Ever hear the story about the kid with the water gun in his front garden? You don't want to.
4. This really goes with the above rule but sometimes costumes have size restrictions too. The reason for this is if there was to be a fire or other threat and the building had to be evacuated quickly, your 30ft across giant HAT OF DOOM would block corridors and fire exits. Costumes with long trains, tailing bits, or tails even really need a person to keep an eye on them incase people trip up, they get caught in elevator doors or catch fire from smoking. So read the rules to avoid major disappointment and a wasted trip.
5. Treat everyone with respect. It may be pretty tempting to laugh at somebody else's costume but if people were doing the laughing at you, you wouldn't be happy. Good sportsmanship is contagious. Never insult somebody for fun, it's not the done thing. At the end of the day you're dressed up as a fictional character in a building full of crazy folk just like you. So no thinking you're above everyone else there. Embrace the inner geek! Be nice to people.
6. Take a picture of the character you are dressed as to show judges. Some people don't even know who Sega are let alone NiGHTS into Dreams characters.
7. Don't get jealous, vindictive or abusive towards people who win prizes if you don't. Just try better next year and put it down to experience. The people who win usually put a lot of time and effort into their work. So just smile and give them your support. Keep striving to be the best!
8. If you're staying in a hotel make sure you take your valuables with you or keep them locked up safely. Having your plane ticket to get home stolen would NOT be good.
9. Have a good transport plan firstly, make sure you can actually GET your costume there and back in one piece in good condition without annoying public transport passengers, causing a scene, or getting stranded with giant bags in a strange city. Plan many months in advance, then you can enjoy the Con more.
10. Always wear your Con ID tag at all times. If you don't want it ruining your costume then tie it under an inconspicuous area of your costume that wont get in the way.
Cosplayers, feel free to share tips below in the comments section.
[ BACK TO MAIN ]
What is Cosplay?
Wiki : "Cosplay (コスプレ kosupure), short for "costume play", is a type of performance art in which participants don costumes and accessories to represent a specific character or idea."
Cosplay simply put, is fans recreating their favorite gaming/anime/comic/tv characters outfits in real life. Cosplayers can create outfits for commission to make money, for collectors, for photo shoots in things like anime magazines, for the purpose of anime conventions, for advertising, for the challenge, for charity, just for the heck of it and mostly above all for fun!
Seeing somebody dressed up as a fictional character can be pretty funny and lame but not everyone understands the full scope of 'cosplay' when seeing it for the first time. It's a highly competitive (and often expensive) art wherein people's skills range from recreating real functional weaponry and blacksmithing to giant fairytale ball gowns, neon colored hair that defies gravity and futuristic anime hover bikes! And that's not even mentioning the talented professional photographers involved.
A costume can cost from $10 up to over $5000+. And as insane as those prices may seem, fans WILL pay for them for the chance to look like and represent their hero.
Most fans of a cartoon have looked at the series and thought 'How would that look in real life, or in a live action movie?'. Well that's what cosplayers do. Bring fantasy to life! Sometimes jawdroppingly well, sometimes really badly, but the point that matters is that they care enough to try in the first place. And to be a cosplayer takes a LOT of guts. (Being a bit crazy helps too).
I used to be quite snide towards cosplayers in general (well come on it IS weird), I'd only ever seen BAD examples of cosplay, until i decided one day i was going to try and create a costume myself to see if i could give it some more credibility. Boy! Is it a challenge! And that's from someone with experience doing theatre wardrobe. The amount of hard work and logic planning that goes into each costume is remarkable. Seriously, try it before you diss it. I also discovered that cosplay and fantasy fashion modeling was a very lucrative glamorous business. Not only that, but i found the cosplay community to be even more absorbing, friendly and helpful than the typical art community. It's a highly competitive area. It also helps you as an artist understand what you're drawing more. So i gained a huge respect for cosplay and set out to hunt down every NiGHTS cosplayer i could find.
Many people see cosplay as being a seedy Japanese adult industry thing were pretty girls dress up as half nekkid characters from the likes of Streetfighter and mud wrestle on video! (We only do that on Friday nights ;P ) There is a huge stigma surrounding cosplay but at the end of the day it's just another side to costume design. I can honesty say i really enjoy cosplaying. Annnnd i never thought i'd say that.
Some cosplayers can take things a little overboard such as bleaching their skin, extreme dieting, obsessive and jealous convention behavior, much comparable to the youths who look at celebrity magazines and get plastic surgery to look like their idols. Just a different area of the media that's all. Some cosplayers often lose it a bit and end up as 'lifestylers'. Which is all fine and dandy but i think when you lose that notion to take off the costume at the end of the day you really gotta re-evaluate why you don't like yourself more than the person you dress up as. But fans are fans, and fans will always have quirks.
Sometimes i'm browsing cosplay photographs and I walk away stunned. Not all cosplayers use detergent bottles hotglued to their head. Real and unique wearable clothing that frankly I wish was available in shops. Since I started getting into cosplay i've also been designing and making my own clothes and textiles. It's a useful skill to have.
Whatever your opinion on Cosplay, i'm sure you can appreciate the fact that some people want to recreate the costuming from NiGHTS into Dreams. The game was inspired by the famous world of Cirque du Soleil which is world renowned for its incredible visual artistry. So colorful and pretty, i hope you enjoy our galleries. I recommend joining the communities in the links section to get you started.
[ BACK TO MAIN ]
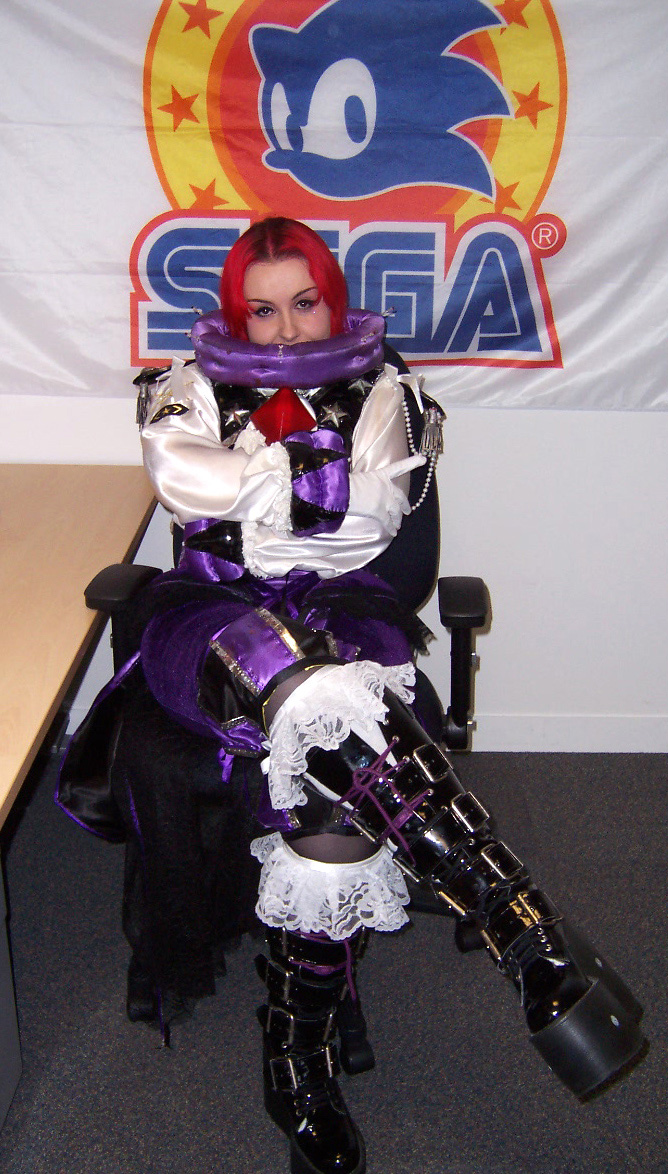
Discovering I have a penchant for making superglittery NiGHTS stuff, I started a big costume project back in December 2004. I have previous experience working in professional Theatre but i'd never really done any personal projects for fun.
In 2008 I was invited by SEGA to cosplay NiGHTS for them at the Guinness Book of World Records event. I had a lot of fun and even got my costume on BBC1 TV and into a number of gaming magazines.
I hope you enjoy my photos and find inspiration to create your own textile projects. Help me promote NiGHTS!
Awards
Auchinawa 2006 – Cosplay Masquerade – Most Elaborate Costume
Guinness World Records – NiGHTS – Most gaming characters in one place
SEGA & Guinness World Records event- March 18th 2008- London:


[ BACK TO MAiN ]